Showing posts with label Fruit. Show all posts

Monday, September 2, 2019

PALEO PLUM CRISP


Plum crisp just out of the oven and cooling.
Having bought a large tub of regular size red burgundy plums at Costco (about 12 to 14 in the tub) I realized that they were going to get soft quickly. Most were stored in the fridge and after eating the four juicy plums left in the fruit basket on the counter, I was thinking that the ones stored in the fridge would likely be soft. After eating about a quarter of a plum from the fridge, my assumptions were correct. The options to consume the eight and 3/4 remaining plums were to either bake with them, stew them or freeze them (a good fall back option). I decided to bake them and make a crisp. The oven was already on as I was roasting a chicken. I baked the crisp in two dishes, a small white ramekin and a glass dish. I used chopped walnuts in the topping. I also did not peel the plums. After cutting the plums up, there was so much juice I had to drain off some of the juice.

The crisp recipe I used was my standard one used to make cherry, rhubarb or apple crisp. A crisp is a crisp and the topping can be used with any kind of fruit. I like to enjoy crisp not only as a dessert but also for breakfast. I add the crisp like a topping to a small bowl of plain greek yogurt instead of adding granola. 

Plums mixed with ingredients in the bowl.
Fruit placed in a small ramekin, topping added and then baked.
The second dish was made in a larger baking dish. Fruit placed in a glass baking dish, followed by the crisp. Crisp was then baked.

INGREDIENTS:

Fruit:

8 medium to large size plums, pitted and sliced into chunks
1 tbsp lemon juice
2 tbsp sugar or stevia
2 tbsp arrowroot powder or minute tapioca

Topping:
1/2 cup slivered almonds or chopped pecans or chopped walnuts
3/4 cup almond flour
2 tbsp coconut flour
1/4 cup honey or maple syrup
1 tsp cinnamon
1/4 cup coconut oil (at room temperature) or butter

DIRECTIONS:

Heat the oven to 350 degrees F. In a large bowl, add the fruit, lemon juice, sugar and arrowroot powder and mix well. In a separate bowl, mix together all of the topping except the coconut oil or butter. Add the oil or butter and mix using a fork or pastry blender so that it forms into crumbs or clumps. Using honey will make it more like clumps.

Grease with oil or butter a medium size baking pan. Add the fruit mixture, spread it evenly across the pan and add the topping to cover the fruit. Bake for at least 30 minutes or until it is bubbling and the topping has browned. Serves 6 to 8 depending on appetites.  

Monday, June 25, 2018

RHUBARB STRAWBERRY PALEO CRISP


Two healthy rhubarb plants are thriving in the garden. I picked quite a bit the other day and froze a bag with four cups of chopped rhubarb, gave some to a friend and used another four cups to make a crisp. I like rhubarb mixed with strawberries. As it is hot outside and not wanting to heat up the kitchen, I cooked the rhubarb on the bbq. I use the top rack above the burners so that the bottom doesn't burn before the crisp is cooked. If you don't have a top rack or what some call a warming rack, you can cook the crisp on the main grill with a few burners turned on and the crisp off to the side without the burner turned on right under the pan with the crisp. Last year I made several pies on the top rack and they turned out well. If the topping is browning too fast on the bbq, cover the pan with tin foil while the fruit cooks. I covered it after about 20 minutes of cooking.

I used honey in the topping and as it was more clumpy versus crumbly, I used my fingers to drop small clumps onto the fruit mixture. The crisp cooked for 50 minutes on the bbq and I had the temperature at about 400 degrees F. 

The consistency of the topping using honey.


Adding the topping to the fruit.

Ready for the bbq.

Cooking on the top rack.
Ready for sampling.


INGREDIENTS:

Fruit:

4 cups chopped rhubarb
2 cups sliced strawberries (fresh or frozen)
1 tbsp lemon juice
3/4 cup sugar or stevia (stevia for baking)
2 tbsp arrowroot powder or minute tapioca

Topping:
1/2 cup slivered almonds or chopped pecans
3/4 cup almond flour
2 tbsp coconut flour
1/4 cup honey or maple syrup
1 tsp cinnamon
1/4 cup coconut oil (at room temperature) or butter

DIRECTIONS:

Heat the oven to 350 degrees F. In a large bowl, add the fruit, lemon juice, sugar and arrowroot powder and mix well. In a separate bowl, mix together all of the topping except the coconut oil or butter. Add the oil or butter and mix using a fork or pastry blender so that it forms into crumbs or clumps. Using honey will make it form more like clumps. 

Grease with oil or butter a medium size baking pan. Add the fruit mixture, spread it evenly across the pan and add the topping to cover the fruit. Bake for at least 30 minutes or until it is bubbling and the topping has browned. Serves 6 to 8.  

Sunday, July 30, 2017

BLUEBERRY CRISP ON THE BBQ

As it is the season for berries, it is hard to resist buying more berries than you can consume. Furthermore, some of the berries that you may have bought are getting soft. A large clamshell of blueberries that we had bought were getting soft. The options were to either freeze the berries or use them in baking. Since it has been so warm outside, turning on the oven did not seem to be a good idea. I decided to bake the crisp on the barbecue. Having already baked a cherry crisp and pies on the barbecue this summer, I decided to bake a crisp using a round speckled blue roasting pan that normally is used to cook a small roast or chicken. I won't use glass or ceramic baking dishes on the barbecue. I prefer to use metal. Using a barbecue for cooking is very handy when you don't want to heat up your kitchen.

This recipe calls for four cups of berries. I had about 3 cups of fresh blueberries and added some frozen mixed berries to make the four cups. I used Splenda in this recipe. 

10 inch round speckled blue roasting pan.

The four cups of berries before and after adding the sugar, lemon juice, cinnamon, and flour.

Before and after adding the oil to the topping mixture. 

Ready for baking.

Baking on the barbecue.

INGREDIENTS:

4 cups blueberries, fresh or frozen
1/4 cup sugar or Splenda
zest and juice from one lemon
1 tsp cinnamon
3 tbsp flour

Topping:

3/4 cup flour
3/4 cup oatmeal
1/2 cup sugar, options: 1/4 cup brown +1/4 cup white or Splenda
1/2 tsp salt
1/2 cup butter or coconut oil
1/2 cup almonds or pecans plus a few extra for the topping

DIRECTIONS:

In a medium size bowl mix the blueberries, sugar, zest and lemon juice, cinnamon and flour. Combine well.

In a separate bowl mix together the flour, oatmeal, sugar and salt. Add the coconut oil or butter and mix together using a pastry blender or mixing spoon depending on the softness of the oil. The coconut oil I used was soft because it is summer time and I used a mixing spoon. I just blended the oil throughout the dry mixture. If the butter or coconut oil is hard, use a pastry blender and blend until the topping looks like crumbles. Add the 1/2 cup of nuts. I used pecan halves and did not chop them. Mix the topping with nuts. I added the nuts to the dry mixture before I added the soft coconut oil as the oil was very soft due to the warm kitchen.

Oil a medium size pan and add the blueberry mixture. Pat it down into the pan. Add the topping evenly over the blueberries and top with a few almonds or pecans if you wish. 

If using a barbecue, preheat the barbecue to 400 degrees F and place the pan over an unheated burner/element. Bake for about 60 minutes.

If using an oven, place into a preheated oven of 350 degrees F for about 45 minutes or until the fruit is bubbling and the topping is browned. Let the crisp cool before serving. Serves 6 or more depending on appetites. 

Adapted from natashaskitchen.com

Monday, August 11, 2014

STRAWBERRY PIE

On a recent Saturday morning we went to the farmer's market.  There are all sorts of stands, from vegetables, to fruit, to jams, to baking, to clothes and soaps.  After looking at all of the pies, the DH was debating on whether to buy a pie.  My inside voice was saying, geez, I can make a pie so I spoke up and volunteered to make one.  The DH wanted a strawberry pie and since we had strawberries in the fridge, this was a done deal.  In making the pie filling, I used 3 tablespoons of minute tapioca and I could have used 2 tablespoons since the berries were not overly juicy.  If the berries are juicy, then use 3 tablespoons.   I also like to use a deep pie dish.  The pie was delicious and the DH ate almost half the pie.  He also said that my pie was better than any of the pies he saw at the farmer's market.


INGREDIENTS AND DIRECTIONS:

Pie Crust
2 cups all-purpose flour
1 teaspoon white sugar or splenda
1/4 teaspoon salt
1 teaspoon baking powder
1 cup vegetable shortening
1/3 cup cold water
1 egg yolk
1 teaspoon vanilla extract
1 teaspoon distilled white vinegar

In a medium bowl, mix together flour, sugar, baking powder, and salt. Cut in shortening  until mixture resembles coarse meal.

In a separate bowl, whisk together water, egg yolk, vanilla extract, and vinegar. 
Stir into flour mixture and knead dough briefly, just until smooth.  Divide the dough into two
and wrap each piece in plastic wrap. Place in the freezer for 15 to 20 minutes before rolling
out.  Pastry is easier to work with when chilled.  It can also be stored in refrigerator for up
to one week.

Makes two crusts.


Crust adapted from allrecipes.com

Pie Filling

4 heaping cups of hulled, chopped or thinly sliced fresh strawberries
1/2 to 3/4 cup sugar or splenda
2 tbsp minute tapioca
1 tsp vanilla

Mix the pie filling in a bowl and add to the pie shell with the rolled out bottom pie crust.  Place the top rolled out pie crust, cut the edges of the crust that hangs over, press down with your fingers or fork all along the rim of the pie plate and then using a fork, make a number of spears into the crust in order to let the steam out.

Bake at 425 degrees F for 10 minutes and then reduce the heat to 350 degrees F and bake for 30 minutes.

Sunday, October 20, 2013

FLAVOURED BALSAMIC VINEGARS

I must admit, I have gone overboard with a recent love.  This summer I stopped in at a specialty store that only sells olive oil, balsamic vinegar, tapenade, and olives.  The store is located in another city not far from where we live.  I had heard about this store but had not had the opportunity to visit it.  When I walked in and saw the variety of oils and vinegars I thought this experience was going to be much better than a store that sells chocolate or kitchen gadgets.  Their feature of buy five bottles and get the sixth one free was also a very good selling point.  And did I buy.  This store called Oliv has since opened at location close to where we live.  Using flavoured vinegars and oils has replaced any thought of using store bought salad dressings.

I have been using the vinegars and oils on much than just salads.  I only photographed four of the balsamic flavours that I use.  Besides garlic, cilantro, coconut, chocolate raspberry and maple, I have developed relationships with sesame ginger, cherry and grapefruit balsamic vinegar.


To give you some examples of what is possible with these vinegars consider this:
-toss cooked green beans with sesame ginger vinegar
-add sesame ginger vinegar to stir fries
-add sesame ginger vinegar to cooked vermicelli noodles
-marinate uncooked steel head trout or salmon with maple vinegar
-toss shrimp with coconut vinegar while sautéing the shrimp
-drizzle maple walnut or caramel ice cream with maple vinegar
-thaw frozen fruit and drizzle it with chocolate raspberry vinegar
-use chocolate raspberry vinegar in place of chocolate sauce
-add garlic cilantro vinegar to beef marinade
-drizzle any of your favourite vinegars on popcorn

I especially like drizzling fruit with chocolate raspberry vinegar.  It helps with the chocolate craving.  You can also add a tablespoon of some of the fruit flavoured vinegars to smoothies.  I am sure that there are many other foods that would go well with flavoured vinegars.

Saturday, May 11, 2013

CARROT AND SWEET POTATO TSIMMIS

Tsimmis has nostalgia for some people and is a comfort food.  Tsimmis can be a combination of meat, vegetables and fruit, is usually sweet and can be eaten as a side dish or even as a dessert.  This tsimmis includes carrots, sweet potatoes, prunes, apricots and pineapple.  It has lots of fibre and tastes terrific.  I didn't add raisins this time and its absence was not noticed.  You can freeze portions after it is baked for future meals.

Ready to go into the oven for baking.
INGREDIENTS:

1 cup pitted prunes
1 cup dried apricots
1/3 to 1/2 cup raisins
2 lbs carrots, peeled, and sliced
1 large sweet potato, peeled, and cubed
1/2 cup honey (to taste)
14 oz (398 ml) pineapple chunks, drained, reserve 1/2 cup juice
1/2 cup orange juice
salt and pepper to taste
1 tsp cinnamon

DIRECTIONS:

Boil water in a small pot, turn off the heat and add prunes, apricots and raisins.  Let stand for 30 minutes.  Drain well.  Meanwhile cook the carrots and sweet potato in a large pot until tender but still firm (about 15 minutes).  Drain well.  Using a large mixing bowl or the large pot used to cook the carrots and potatoes, gently combine all of the ingredients except the pineapple chunks.  Place the mixture in a 3 quart casserole dish and bake covered at 350 degrees F for 30 to 35 minutes.  Stir in the pineapple chinks and bake uncovered for 15 more minutes, basting once or twice.  Serves 10.  This dish freezes and reheats well.

Modified from MealLeaniYumm by Norene Gilletz

Friday, October 5, 2012

BLUEBERRY PEACH COBBLER

After seeing this recipe in a newspaper this past August, the DH reminded me that I hadn't yet made a peach cobbler this year and as peaches were still available, I should consider baking a cobbler.  The combination of peaches and blueberries was too good to pass up.   After getting a supply of peaches and berries, I made the cobbler.  You can also make this recipe using frozen fruit instead of fresh.

I used splenda instead of sugar in the recipe and only used 1/4 cup in the filling.  I also had to use two baking dishes as the large one would have been too full.  The second baking dish was a mini baking dish and served as the overflow dish.  The end result was a tasty cobbler according to the DH.  It met his expectations.

Berries and peaches.

Flour, sugar and other ingredients sprinkled on the fruit.

Mixing the cobbler dough

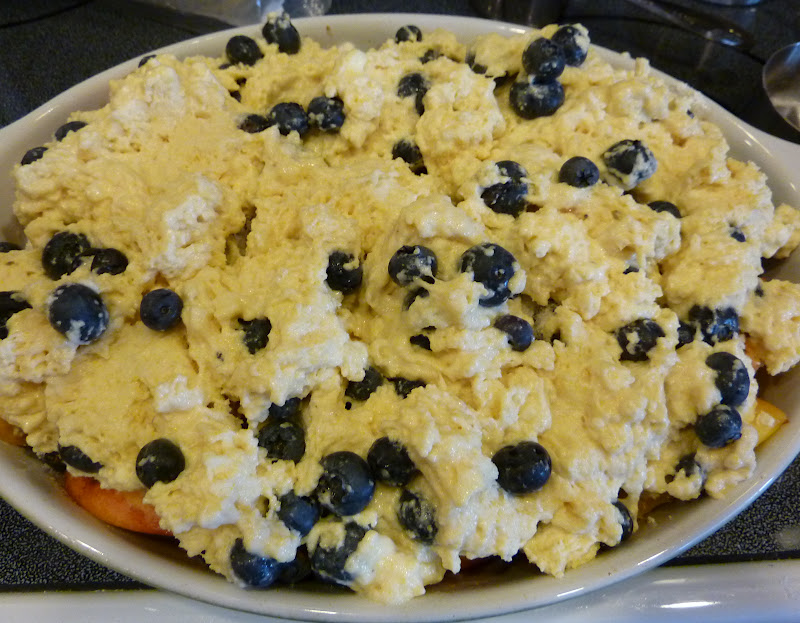
Dough spread over the fruit and ready for the oven.

Ready for sampling.


BLUEBERRY PEACH COBBLER

INGREDIENTS:

Filling

3 pound of ripe peaches (7 to 9)
2 cups blueberries
¼ cup white sugar or splenda
¼ cup brown sugar
2 tbsp lemon juice
¼ tsp cinnamon
1/8 tsp salt
2 ½ tbsp flour

Topping

1 ½ cups flour
½ cup cornmeal
1/3 cup sugar or splenda
2 tsp baking powder
½ tsp salt
½ cup butter, chilled and cut into pieces
1 tsp vanilla
1 cup buttermilk or one cup of milk with 1 tbsp of vinegar (soured milk)
1 ½ cups blueberries

DIRECTIONS:

Wash the peaches and cut each peach into 8 slices or more, leaving the skin on and discarding the pit.  Place the peach slices into an 9 X 13 dish along with the two cups of blueberries.   Sprinkle the sugar, lemon juice, cinnamon, salt and flour over the top of the peaches and berries and if you can try to stir the mixture.  Set aside.

To make the topping, combine the flour, cornmeal, sugar, baking powder and salt in a bowl.  Add the butter and using a fork or pastry blender, mix the butter into the dough until it is crumbly.  Add the vanilla to the buttermilk or soured milk and combine.   Pour the milk over the flour mixture and mix it together but don’t over mix it as this is biscuit dough.  Fold in the blueberries.  The dough will be sticky to handle.  Using a wooden spoon, place a spoonful of the dough on top of the fruit creating nine mounds or so of dough on top of the fruit.  If you have more dough, then add it to the spaces between the mounds.   

Bake at 375 degrees F for 50 minutes or until the biscuits dough is golden brown and the fruit mixture is bubbling.  Let cool and serve with ice cream.  Store leftovers in the fridge.   Serves 6 to 8 depending on appetites.

Adapted from Globe and Mail, Aug 22, 2012

Sunday, August 7, 2011

NEVER FAIL PASTRY FOR CHERRY PIE


With one cherry tree being ready to pick while the cherries on the second tree were not quite ready, I have been steadily processing cherries.   After washing the cherries, I start to pit them.  In a blog that I posted last year, I provided pictures of the cherry pitter.  It is a manual pitter and does one cherry at a time.  Instead of making jam, I decided to pit all of the cherries that I had picked one week to make a pie and freeze the rest in four cup portions.  With lots of arm action, almost 14 cups of pitted cherries were processed.  

In making the pie I looked for my standby pie crust recipe on the Crisco container.  The recipe on the back didn't include vinegar and egg but the standard water, flour and shortening.   I went looking for a new pastry recipe and found one on allrecipes.com.  The pie crust and pie turned out wonderful.  The pie crust was flaky and tender.  The pastry includes an egg yolk, sugar, salt, vanilla extract and baking powder.  I never have used baking powder before in a pie crust.  The DH who is an expert on pies, says the pie crust and the pie was pretty good. 


Vegetable shortening added to flour mixture.


Mixing up the liquid ingredients.

Shortening is cut into the flour mixture.

I cut the dough into two halves and wrap each half with saran wrap prior to chilling.

I roll the dough out on parchment paper.  You can also use wax paper.  Less mess to clean up on the counter.

Rolling out the dough.

I like using deep dish pie plates.
To make the pie filling I mix 4 cups of pitted cherries with 1 cup of sugar, 3 tbsp of small minute tapioca and 1 tsp almond extract.

Cherry pie filling added to pie shell.

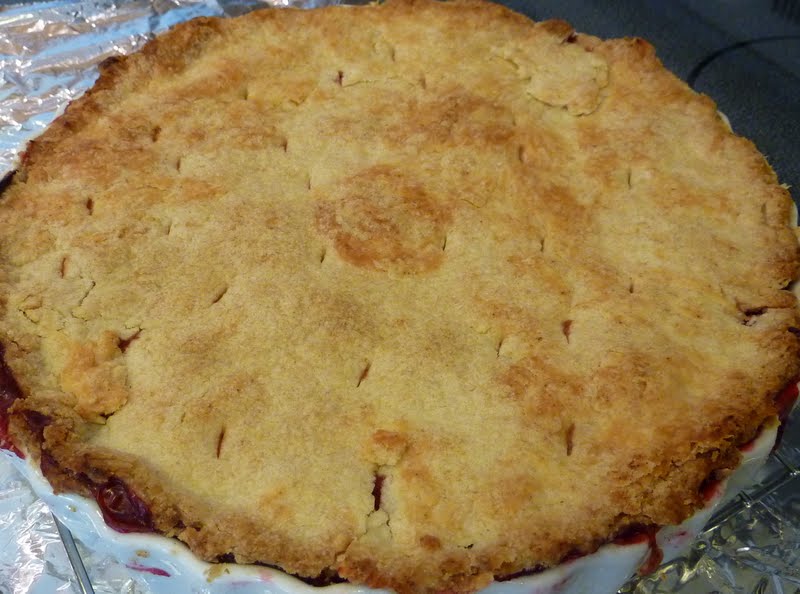
Out of the oven after baking for 40 minutes.  First 10 minutes at 425 degrees F and then 30 minutes at 350 degrees.

The first slice eaten by the DH.

 Yields 1 double crust

Ingredients
2 cups all-purpose flour
1 teaspoon white sugar
1/4 teaspoon salt
1 teaspoon baking powder
1 cup shortening
1/3 cup cold water
1 egg yolk
1 teaspoon vanilla extract
1 teaspoon distilled white vinegar

Directions
In a medium bowl, mix together flour, sugar, baking powder, and salt. Cut in shortening until mixture resembles coarse meal.
In a separate bowl, whisk together water, egg yolk, vanilla extract, and vinegar. Stir into flour mixture and knead dough briefly, just until smooth. Allow to rest 15 minutes before rolling out. Place in the freezer for 15 or 20 minutes. Pastry is easier to work with when chilled. Can be stored in refrigerator for up to 1 week.

Pastry recipe from allrecipes.com

Tuesday, August 2, 2011

RASPBERRY PIE

Not far from where we live is a u-pick fruit farm.  In the past we have picked sour cherries (before we got our own trees), strawberries and saskatoons.  This year we picked raspberries, lots of raspberries.  Three large ice cream pail of berries.  I couldn't decide if we should pick three or four containers but I am happy we picked just three after washing, picking through the berries for ones that needed to be discarded and then measuring into the quantities for bagging and freezing.  We froze numerous bags for smoothies, adding to yogurt, making fruit crisps and other baking delights.

The raspberry pie turned out really well.  Using the crust recipe from the sour cherry pie, I didn't have any trouble rolling out the crust.  In fact I had a bit of dough leftover so I made a small fruit pie in a small ramekin using blueberries and blackberries.  Both pies were a hit with the DH.

The recipe for making the raspberry pie is simple.  You need to make the recipe for a double pie crust and the filling is 4 heaping cups of raspberries mixed with 2 tbsp of corn starch and half a cup of sugar.  Bake at 425 degrees F for the first ten minutes and then 27 to 30 minutes at 350 degrees F.

Picked raspberries in an ice cream pail container. 

Bagged and ready to be put in the freezer.

Raspberry pie filling  - berries, sugar and corn starch.

Pie ready to go into the oven.

Finished baking after 37 minutes at 350 degrees F.

Side view of slice for the DH.

Another view of the pie.

Blueberries and blackberries used with leftover dough and baked in a small ramekin.

Saturday, December 25, 2010

BAKED APPLE SLICES

I sometimes buy more apples than what we can eat at a reasonable pace and eventually we have too many apples.  I also prefer harder apples and so the search is on to figure out what to do with apples that are losing their crunch appeal.  I had six apples that needed to be used, they were losing their crispness and I had recently purchased more apples for the mid morning or afternoon work snack.  An easy recipe to make is baked apple slices.  I think the trick is to thinly slice the apples, the thinner the better.  If you want to have a more drier baked apple slice, you will need to bake it for longer than the 15 minutes than I did for this recipe.  Mind you, some slices were starting to dry already.  I provided the directions for this recipe in the photos.

Thinly slice apples and place on a parchment lined cookie sheet.  You need a sharp knife to really thinly slice the apples. 

Sprinkle the apples with brown sugar and cinnamon and bake for 15 minutes at 375 degrees F. 

Friday, August 13, 2010

CHERRY CRISP

I like making fruit crisps as they can be an easy and quick dessert to make.  I made this crisp using the cherries that I picked from our cherry trees.  I also used the cherries from the backyard trees to make jam, jelly and a pie.  This was profiled in an earlier blog (link here).  

The following recipe is good with any berries, apples, peaches, nectarines, plums or your other favorite fruit.  I made this recipe using spelt flour as one of the dinner guests that I served this to is on a gluten free diet.  As I was making this crisp for company, I doubled the recipe and used a deep pan.

INGREDIENTS:
4 cups of pitted cherries or other fruit
2 tsp almond flavouring if using cherries or lemon juice
2 tsp tapioca
1/2 cup white sugar (only if using sour cherries)
1/2 cup quick cooking oatmeal
1/2 cup flour
1/2 cup butter, melted
1/2 cup brown sugar  

DIRECTIONS:
In a medium size bowl, mix the cherries, almond flavouring, tapioca and white sugar.  Pour this mixture into a 9 inch pan.  Rinse the bowl and mix the flour, oatmeal, butter and brown sugar.  Spread this crumbly mixture over the the cherries.  Bake at 375 degrees F for about 30 to 35 minutes.  The crisp should be brown and the fruit will be bubbling.  Serve warm or cold by itself or with ice cream.  Makes about 6 servings.

Thursday, July 22, 2010

CHERRIES

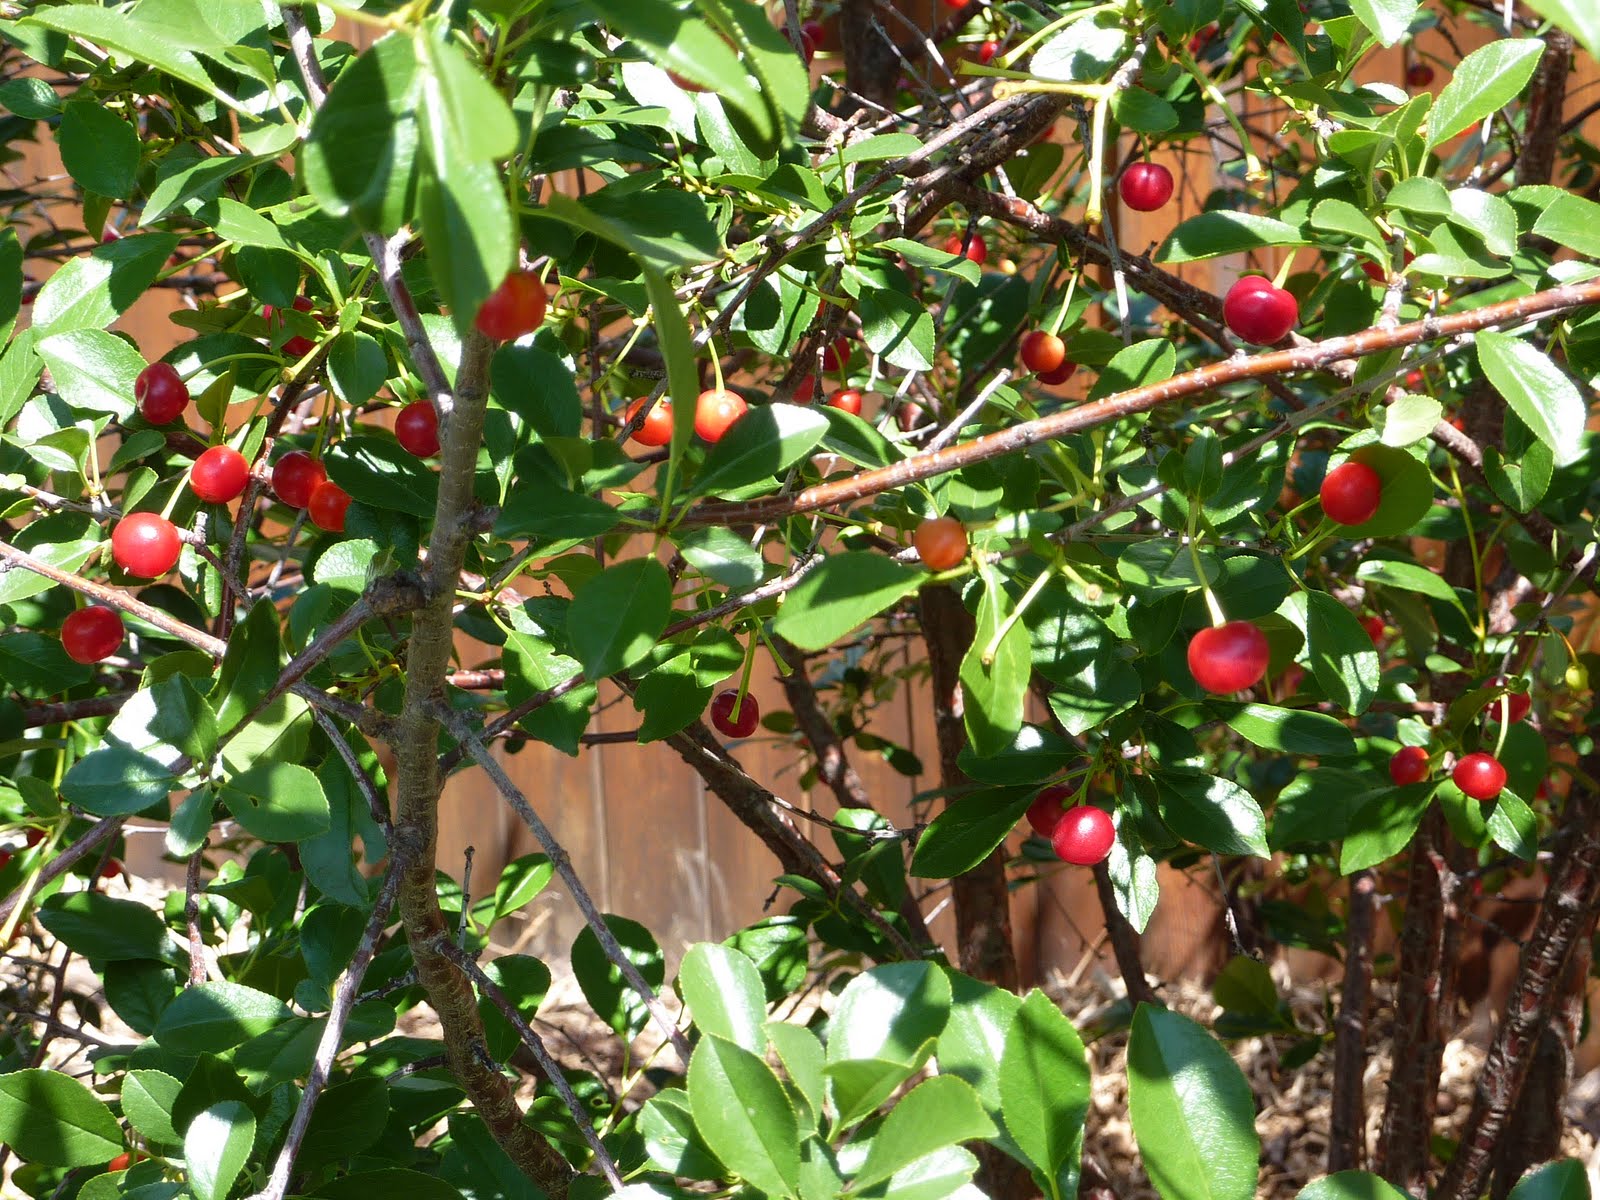
In our backyard we have two varieties of cherry trees.  One has berries the size of bing cherries and the second tree has fruit the size of large blueberries.  Before we had cherry trees, we used to go pick sour cherries at a local U-Pick farm.  That was my first introduction to making cherry jam, jelly and real cherry pie.
If you are going to get serious about making jams, jellies or syrups, you need to have a cherry pitter.   This manual cherry pitter operates using a plunger which pushes the pit out of the cherry.  You can only pit one cherry at a time which therefore does require time to process the eight cups of cherries needed to make jam.  I made a double batch.
Making cherry jam is not difficult, it just requires pectin, pitted cherries, sugar, almond flavour and sealers. 
Here is the finished product.
I also decided to make syrup and to make things easier I first cooked the cherries and did not pit them.  Instead I used a strainer to separate the juice from the pulp and pits.  This old fashioned strainer works well and I have also used it to make apple sauce.
When making syrup, jam or jelly, you have to skim the froth off the surface before you ladle it into hot sterilized jars.   This week I made a total of 28 jars of jam and syrup.  We have more than enough for the next year and I also like to have jars to give as hostess gifts.


The DH loves pie and homemade cherry pie is probably one of his favorites,  I made this pie today using whole wheat flour for the pie crust, 4 cups of pitted cherries, one cup of sugar, three tablespoons of minute tapioca  and one teaspoon of almond extract. I made the pie after making 13 jars of syrup.  What a day!