Monday, April 6, 2020

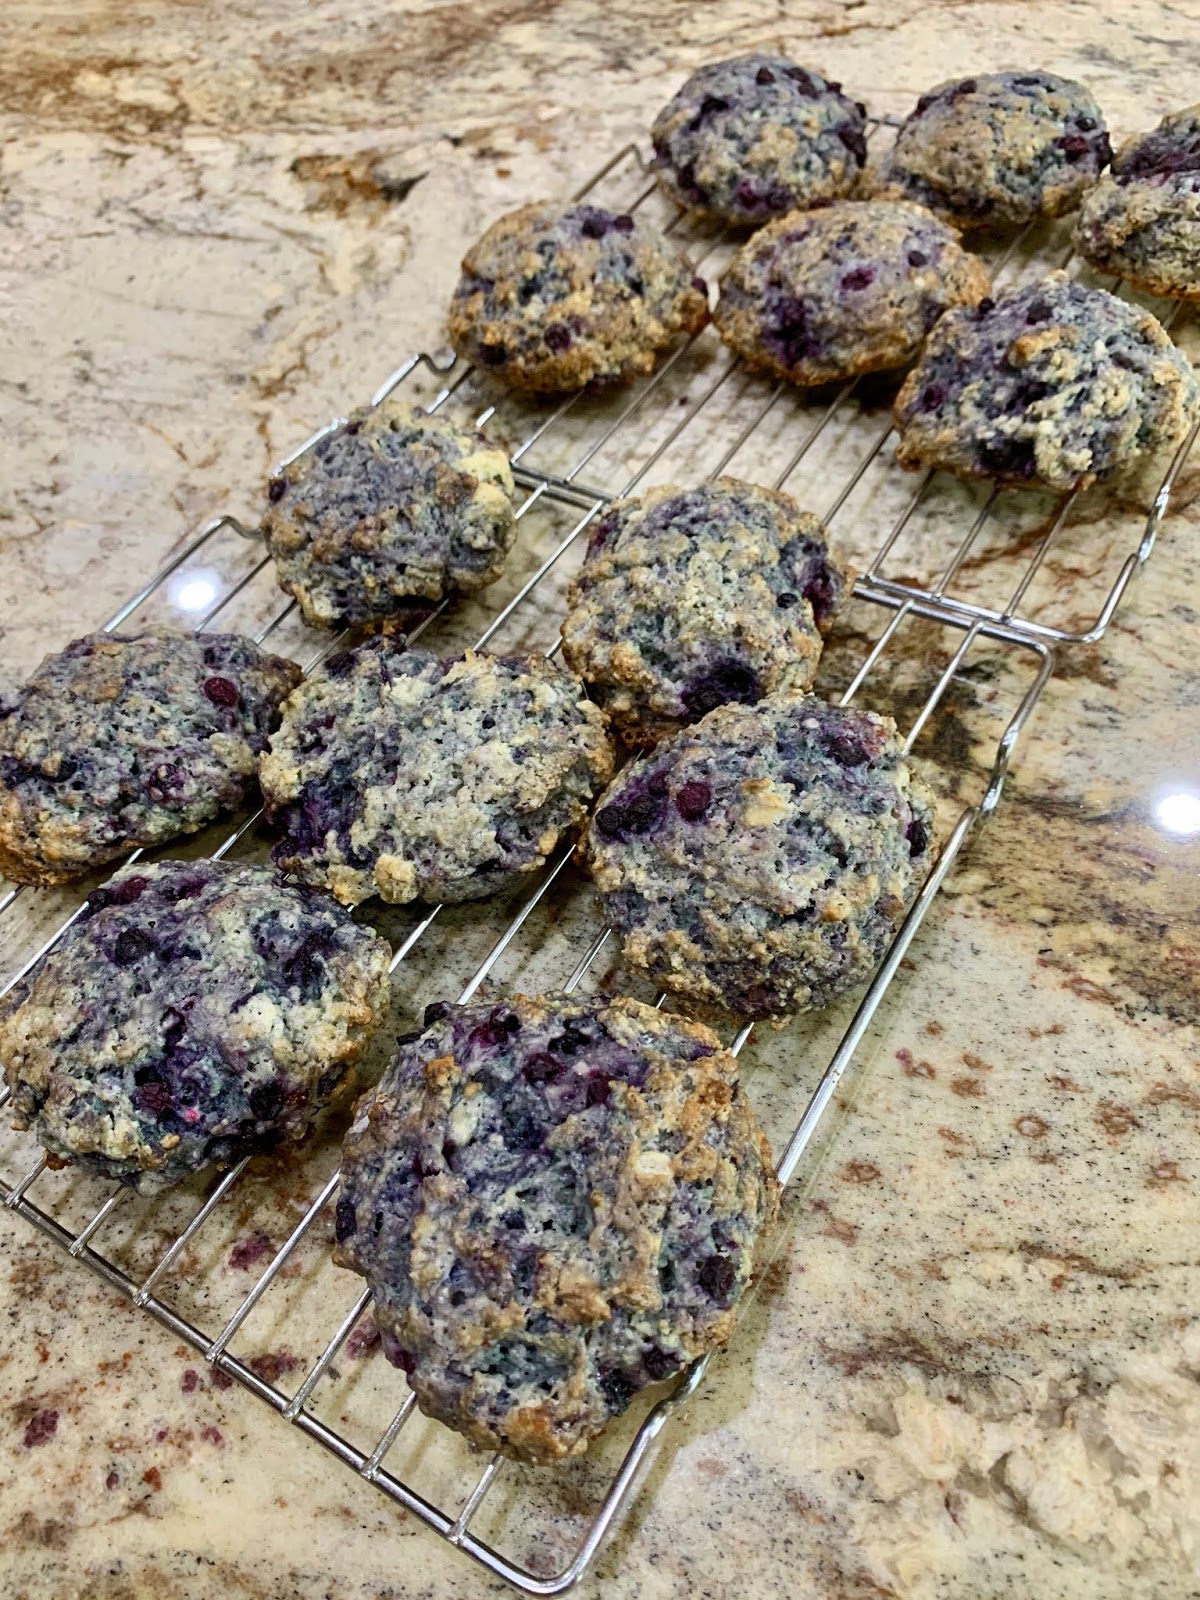
BLUEBERRY SCONES


I like scones but I haven't made them often over the years. I have usually gravitated to baking muffins or loaves. There are some scones that I prefer - ones not too sweet and without a glaze. I figure if I want glaze and sugar I can have a donut.

A friend recently posted some of her baking on several of the social media sites I follow. One of the photos were these blueberry scones. They looked really good. Of course I had to ask her for the recipe and she told me that it was from Sally's Baking Addiction website. This website has a number of great looking recipes. 

I followed the ingredient list and baking instructions and made one substitution. I didn't have any buttermilk in the house nor heavy cream except for the 10 percent cream that I use for coffee. Coffee wins on using the cream versus using it for scones. Instead, I used a tin of light coconut milk as an alternative. By opening a tin of light coconut milk, this has resulted in thinking about how to use the remaining coconut milk in another recipe. I didn't brush the top of the scones with any cream before baking nor did I sprinkle sugar. I used a generous cup of frozen wild blueberries. There are many options you can add to scones and they can be sweet or savoury depending on your preferences.

The recipe calls for grating the frozen half cup of butter using a box cutter grater and I dutifully grated the frozen butter. I have cut corners in the past by not using a grater to add butter to a recipe when making a dough or a crumble. Using grated butter makes mixing the flour mixture with a pastry cutter so much easier.

In making scones you can cut the dough into triangle scones or make drop scones. I chose to make drop scones and made 13 scones. I baked them for 20 minutes at 400 degrees F using regular heat, not convection.

Drop scone dough ready to go into the fridge to chill.

Ready for sampling.

Scones cooling on the rack.
The scones taste fabulous. They are light, have a crunchy coating and soft on the inside.

Sally's three tips for perfect scones are:
  1. Heavy Cream or Buttermilk
  2. Frozen Grated Butter
  3. Refrigerate Before Baking
 
Sally's Baking Addiction (https://sallysbakingaddiction.comIn/scones-recipe/ )

Sunday, February 16, 2020

PEANUT BUTTER BANANA CHOCOLATE CHIP LAYER CAKE


I have always admired cake bakers and cake decorators. Their artistic creations and imagination to make pretty or stylized cakes can be a work of art.

I have never made a double or triple layered cake. I have shied away from it and kept to muffins, regular cakes, loaves, cookies and bread. I am a regular reader of the blog from Ambitious Kitchen and seeing this peanut butter banana chocolate chip three layer iced cake (Ambitious Kitchen) intrigued me. It was time to venture into trying something new.

Because I love kitchen gadgets, tools and baking bans, I invested in a few things as I didn't have some of the required cake making tools in my arsenal. For valentine's day, the DH bought me a cake decorating turntable and some decorating tools and I bought three - six inch cake pans (3 inch deep) along with some icing knives. I realize if I want to make some different cakes, I will need some eight inch cake pans.

There are numerous recipes for peanut butter banana layer cake. This recipe from Ambitious Kitchen interested me because I have already made many recipes from her blog site; the ingredients include almond and coconut flours; it doesn't have an excess amount of sugar; and, I understood her baking instructions. I did do some additional research on how to bake a layer cake, how to prep baking pans and decorating a cake. Baking and decorating cakes is a new world for me and I might try to make some novel cakes in the future.

The frosting requires powdered sugar. I made my own powdered sugar from coconut sugar. It is easy to do and involves blending in a high speed mixer the sugar required for frosting until it has a powdered texture. To make it more powdered, you can add one tablespoon of arrowroot or tapioca flour for every one cup of coconut sugar added to the blender. If you are not making it paleo, you can also use corn starch.

There are lots of ways you can decorate a cake with chocolate chips. I tried to be simplistic and not over do the number of chips pressed into the icing. I did measure the height of the cake with the icing and it is five inches. You can make the cake using two - eight inch cake pans and the height of the finished cake would be less.

I baked the cake batter the day before I was going to serve the cake. I lined the bottom of each cake pan with a round of parchment paper and used a cooking oil spray under and over the parchment paper and also sprayed the sides of the pans. I lightly floured the sides of the pans after applying the cooking spray. I let the cakes cool in the pans and they were very easy to remove from the pans. I continued to cool them on baking racks. Once the cakes were thoroughly cooled, I wrapped each one in plastic wrap and stored them in the fridge. The following afternoon I made the peanut butter icing.

Everyone who sampled the cake gave it a thumbs up.


Sunday, February 9, 2020

COUNTRY VEGETABLE SOUP


For this week's soup, I decided to make a vegetable soup with chickpeas to provide some protein. The freezer has some frozen garden vegetables which need to be used before summer arrives. It is time to use the zucchini and green beans. I shred zucchini during the summer and freeze it in quantities of two cups. I also froze several bags of green beans in half cup quantities. I used fresh tomatoes in this recipe but you can use frozen or canned tomatoes. I added frozen parsley as I froze chopped parsley last fall to use in cooking during the course of the winter. I did add another cup of water while the soup was cooking as it was getting too thick. You can add other vegetables to the soup pot as a country soup is really about using what you have available.

The soup is a flavourful vegetable soup and will be great for lunches.

INGREDIENTS:

2 tbsp oil
1 onion, chopped
2 garlic cloves, minced
1/4 of a medium size cabbage, finely chopped
2 carrots, chopped
2 celery stalks, chopped
5 mushrooms, chopped
4 tomatoes, skinned
2 cups zucchini, shredded
1/2 cup green beans (optional)
1 can (540 ml) chickpeas, drained
1 tsp Italian seasoning
6 to 7 cups of chicken/veg/beef broth or water
handful of parsley, chopped
salt and pepper to taste

DIRECTIONS:

Add the oil to a large soup pot and heat to medium high. Once hot, add the onion, garlic and cabbage, reduce the heat to medium and sauté for a few minutes. Stir as you don't want to burn the onions or garlic. Add the carrots, celery and mushrooms and continue to sauté for another few minutes. Add the rest of the ingredients. Cover the pot with a lid and bring the soup to a boil and then reduce the heat to simmer. If the soup is getting too thick while simmering, add some more water. Simmer for 45 to 60 minutes until the vegetables are soft. Taste to see if more herbs or spices are needed and serve. Serves 8.

Sunday, February 2, 2020

CHICKEN VEGETABLE TORTELLINI SOUP


A friend sent me a link to a popular slow cooker chicken tortellini soup. The recipe has been on reddit. There are a number of different versions you can find. I decided to create my own based on some of the common ingredients used.

I made the soup in a slow cooker but it also lends itself to being made in a soup pot on the stove. I used frozen multicoloured tortellini. After adding the frozen tortellini to the slow cooker pot, I cooked it on high for ten minutes but the frozen uncooked tortellini had cooled the soup when added. The slow cooker pot I was using has a number of features including one for reducing sauces. I selected that feature and got the soup to bubble.

The soup is very good and both the DH and I enjoyed it.

INGREDIENTS:

1 tbsp oil
1 tbsp butter
1 onion, chopped
2 cloves garlic, minced
1/2 tsp Italian seasoning
3 tbsp flour

6 cups chicken broth
1 pound boneless skinless chicken thighs
1 small can (14 oz) tomatoes or equivalent frozen tomatoes
6 to 9 fresh mushrooms, chopped OR 1 can of mushrooms
1 stalk celery, chopped
salt and pepper to taste

2 cups frozen or fresh tortellini
2 to 3 cups fresh spinach
1/3 cup grated Parmesan cheese

DIRECTIONS:

In a soup pot or in your slow cooker, if it has a sauté function, add the oil and butter and heat to medium heat. Once hot, add the onion, garlic and seasoning. Sauté for a few minutes to soften the onions but to not burn or brown the onions or garlic. Add the flour and stir to make a roux.

Add the broth, chicken, tomatoes, mushrooms, celery and salt and pepper to the soup pot or slow cooker.

If using a soup pot, bring to a boil and then reduce heat to a simmer for about two hours.

If using a slow cooker, cook on low heat for four to six hours or on high heat for two to three hours.

Take the chicken out and shred it or cube it into small pieces. Add it back to the soup.

Add the tortellini and spinach to the pot and cook for another 10 minutes on high if using a slow cooker or on medium heat if using the stove top method. The pasta needs to cook. Frozen pasta will require more time to cook in the slow cooker, likely 20 minutes. Add the Parmesan cheese and serve.  Serves 4 to 6 people depending an appetites.


Sunday, January 12, 2020

TOFU VEGETABLE SAUTE

Tofu sauté cooking in a large non-stick electric frying pan.
A friend gave me a recipe she likes to make for a spicy peanut tofu stir fry. It looked delicious. I decided to modify it based on my preferences and the vegetables I wanted to use. You can add other vegetables to the dish than the ones I have listed. What attracted me to make this recipe is that tofu goes great with a sauce and I have been working my way through eating 1.4 kgs of tofu that we bought at Costco. I also like sautéed vegetables. 

The tofu package that was already opened was just over 10 ounces and I used that and did not open a new package to add another six ounces to make a pound. 

The dish was very good and the DH even had a helping. You can serve the tofu sauté with rice, quinoa, couscous or vermicelli noodles. I served it with a wild rice blend.

All the ingredients added except for the spinach, sauce and cilantro.

INGREDIENTS:

2 tbsp oil 
1 garlic clove, minced
1 pound (454 grams) of firm or extra firm tofu, drained
2 tsp flour, tapioca or arrowroot flour
5-6 mushrooms, sliced thin
1 celery stalk, chopped
1 coloured pepper, sliced into thin strips
2 green onions, chopped or 1 medium size onion, chopped
small bag of spinach ( 5 to 6 ounces, 140-170 grams)
handful of chopped cilantro (optional)

Sauce

1/2 cup orange or apple juice
1/4 cup almond, peanut or other nut butter
2 tbsp soy sauce or substitute
1-2 tbsp sweet chili sauce or spicy peanut sauce

DIRECTIONS:

Slice the tofu into small chunks, add the flour, mix and set aside. In a small bowl mix the sauce ingredients and set aside.

Heat the oil in a large non-stick frying pan to medium high. Add the garlic, mushrooms, celery and pepper (and onion if using instead of green onions) and sauté for three to four minutes. Reduce the heat to medium. Add the tofu and green onions (if using) and sauté for another four minutes or until the vegetables are tender. Add the spinach, combine well in the pan and add the sauce. Stir everything. Continue to cook until the spinach is wilted. Add the cilantro if using. If the sauce gets too thick and the food sticks to the pan, add a bit of water. Serves 4 to 5. 


Friday, December 13, 2019

CHEESE THUMBPRINT MINI TARTS

Thumbprint tarts cooling on the rack before sampling starts.
About 15 years ago a friend gave me this recipe for cheese thumbprint mini tarts. It first appeared in one of my blogs in 2009. Over the years I have made these tarts but usually only around December. It is a recipe you can make year round. Today I made a double batch which I will freeze and use when company comes over or when I want to bring some appetizers over to a friend's home. 

In making a double batch, I didn't double the ingredients but made two batches. Based on doubling the ingredients one time when I did double the recipe, I thought it was too much batter to mix up at one time and didn't get the consistency I wanted. In previous years I would have used a hand grater to grate the cheese. Today I thought I would be smarter and use a mini food chopper to shred the cheese. Using a mini chopper made it so much easier. I used old cheddar cheese as it gives a sharper taste. Making a double batch, I baked 108 tarts.

These thumbprint tarts are always popular and making them in advance and freezing them is a good way to pace yourself during the holidays.

Added the shredded cheese to the softened butter.

Wrapped and ready to harden in the freezer for 20 minutes.

These are the mini muffin/tart pans I use.

Adding the pepper jelly to the unbaked tarts. 

INGREDIENTS:

2 cups of grated cheddar cheese, old cheddar is preferred
1/2 cup or 4 ounces of softened butter
1 cup flour
1/2 tsp paprika
1/4 tsp cayenne pepper
chili pepper jelly

DIRECTIONS:

Preheat the oven to 400 degrees F.

Combine all of the ingredients except the pepper jelly in a bowl. Mix well as you want the softened butter to be incorporated into the other ingredients. 

Chill the dough mixture in the freezer for about 15 to 20 minutes. I usually place the dough
mixture onto two pieces of plastic wrap, wrap it tightly and chill.  

Take a heaping teaspoon of the dough mixture and spoon it into mini muffin or tart pans. Press your thumb into the dough, pat it down and make a well in the middle. It should look like a mini tart. Take 1/2 tsp of the jelly and place it in the well of the tart.  You can use a combination of red and green pepper jelly.   

Bake at 400 degrees F for 10 minutes. Makes 4 dozen. Can be wrapped and stored in the freezer.

Sunday, November 24, 2019

CHICKEN MUSHROOM STEW

Chicken mushroom stew placed over mixed wild rice blend.
With a frozen bag of chicken thighs and breasts in the freezer, one needs to create some variety in cooking it for a meal. I like to try a few things to liven up recipes using chicken breasts or thighs. These recipe ingredients are not unique except perhaps for the Thai peanut sauce. This recipe can be downsized or made larger depending on the number of people you want to feed.

I used about one and half tablespoons of the Thai peanut sauce in the sauce as it has some heat to it. I also added 2 teaspoons of almond butter to the sauce. I used oat milk and it worked well in making the sauce.

I made a mixed wild rice blend to serve with the chicken mushroom stew. It was enjoyed by all. This is a recipe I would be comfortable making on a regular basis.

Vegetables are being sautéed. 

Thai peanut sauce that I used in the sauce.
Sauce thickening on the stove in the dutch oven.
Ready to go into the oven.

INGREDIENTS:

4 chicken thighs, boneless and skinless

3 tbsp olive or other preferred oil
1 onion, chopped
3 carrots, peeled and chopped
2 celery, chopped
2 garlic cloves, minced
4 to 5 large white or crimini mushrooms, chopped

2 tbsp butter
3 tbsp flour
3/4 cup milk
1 cup chicken broth
2 tbsp Thai peanut sauce or almond/other nut butter (optional)

salt and pepper to taste

DIRECTIONS:

Preheat the oven to 350 degrees F.

Cut the chicken thighs into small pieces. Heat two tablespoons of olive oil in a large skillet (oven proof) or a dutch oven to medium heat. Sauté the chicken until browned. Transfer the chicken to a small bowl.

Heat the remaining tablespoon of oil in the skillet or dutch oven on medium heat and add all of the chopped vegetables and garlic. Sauté for four to five minutes, add salt and pepper to taste. If the temperature is too hot, lower it. Transfer the vegetables to the bowl that has the chicken.

Melt the butter in the skillet or dutch oven on medium heat. Add the flour and stir for one minute. Add the milk and whisk it until it thickens. Add the broth and the peanut sauce or nut butter. Whisk until it is mixed. Taste the sauce and adjust it with seasoning if required. Add the chicken and vegetables back to the skillet or dutch oven and combine well.

Cover the skillet or dutch oven with a lid or tin foil. Bake in the oven for 30 to 40 minutes. You can also cook the stew for longer but I would reduce the oven temperature to 325 degrees F. Serves 4.

Tuesday, November 5, 2019

HUMMUS (vegan)


Processing finished, hummus placed into a glass bowl for storing in the fridge.
Most hummus recipes made with chickpeas are similar in the basic ingredients added - tahini, cumin, garlic, lemon juice, salt and olive oil. I have posted several hummus recipes in past blogs that included variations from adding herbs or using a different main ingredient such as pureed beets or black beans. I decided to make traditional hummus and not include yogurt which I have added in the past. But I also made another change and that was taking the skins off of the canned chickpeas. I had read/heard that the best and creamiest hummus is made with the skins removed from the cooked chickpeas. Leaving the skins on the chickpeas makes a difference in the taste.

A few steps are required to remove the skins off of the canned chickpeas.
1. The canned chickpeas are drained in a colander while reserving some of the liquid as it is required in the recipe.
2. Run cold water over the chickpeas in the colander to give them a good rinse.
3. Take a small handful of chickpeas in the palm of your hand and gently rub your hands together. The skin will loosen from each chickpea. Separate the skins from the chickpeas. Put the skinless chickpeas into a bowl or the food processor. Another option for removing the skins is to take a good handful of chickpeas, place into a bowl of cold water and rub the chickpeas between your fingers. Separate the skins and add the skinless chickpeas to another bowl or the food processor.

It can be a bit tedious separating the skins from the chickpeas but the taste of the hummus is worth it.

Skins removed from the chickpeas.
Ingredients being added to the food processor
INGREDIENTS:

1- 540 ml (15 ounce can) chickpeas

1/4 cup drained liquid from the canned chickpeas
1/3 cup tahini
2 to 3 tbsp lemon juice
1/2 tsp cumin
2 garlic cloves, minced
2 tbsp good quality olive oil
1/2 tsp salt

olive oil for drizzling prior to serving (optional)

DIRECTIONS:

Drain the can of chickpeas while reserving one quarter cup of the liquid. Rinse the chickpeas with water using a colander. If you want to skin the chickpeas, the directions are provided above.


Add the chickpeas, chickpea liquid, tahini, lemon juice, cumin, garlic and salt into a food processor. Process until it is smooth. While the machine is blending, slowly add the olive oil to the hummus. Stop the machine and check for taste. Adjust for taste by adding more garlic, lemon juice or oil. If it is too thick you can add a little bit of water. Continue processing until the hummus has the texture you want. Store in the fridge until ready to serve. Before serving, drizzle some olive oil on top to add some flavour. You can also garnish with chopped parsley or cilantro.

Monday, October 21, 2019

PALEO HEMP HEART SEED COOKIES

Ready for sampling
I was looking this morning at the big bag of hemp heart seeds in the fridge and thought I need to use these hemp hearts more frequently. I added a tablespoon to my breakfast yogurt this morning. The second brilliant idea was to make cookies. These cookies are filling, not too sweet and versatile if you want to add raisins or chocolate chips to them. I didn't add any extra ingredients.

In making these cookies I used honey and softened it by warming it in the microwave. I used cassava flour and added 2 tablespoons of almond flour after I mixed all of the ingredients in order to stiffen the batter. I chopped whole almonds in a small food food chopper and tried to not over chop them and make them too fine. I baked the cookies for 10 minutes using convection heat. Because I like smaller cookies, I made 15 cookies. These cookies are delicious and I will keep them on my list as cookies to be made often. 


Cookies cooling on a rack.

INGREDIENTS:

1/2 cup hemp seed

1/2 cup cassava flour or almond flour; additional 1 to 2 tbsp if required
1/2 cup shredded unsweetened coconut
1/2 cup slivered or chopped almonds
1/3 cup melted coconut oil
1/4 cup maple syrup or honey
1 egg, slightly beaten

DIRECTIONS:

Preheat the oven to 350 degrees F. Line a baking sheet with parchment paper.


In a medium size bowl mix all of the dry ingredients. Add the coconut oil, honey and egg. Combine well. If the batter needs a slight thickening, add one to two tablespoons of almond or cassava flour.

Using a medium size cookie dough scooper or your fingers, shape about 1.5 tablespoons of dough into a ball and place on the cookie sheet. Slightly flatten with your fingers. Leave a little bit of space between each cookie on the baking sheet.

Bake for 10 to 12 minutes until golden brown. Makes 12 to 15 cookies.

Recipe adapted from irenamacri.com

Monday, October 7, 2019

BEEF, BARLEY AND MUSHROOM SOUP

Soup cooling off in the pressure cooker pot.
It is getting to be soup weather with the nip in the air and close to the freezing mark in the early morning hours. I don't need excuses to make soup as it is almost a weekly event in my kitchen. In one area of my freezer I have multiple bags of leftover cooked veggies, rice, chopped chicken, turkey and roast beef and chopped herbs from the garden. These are saved for adding to future soups. With that in mind and knowing I need to use those frozen packages, I took out a package of chopped roast beef which was about one and half cups. There was a large container of fresh mushrooms from Costco in the fridge so the decision was obvious - beef, barley and mushroom soup.

If you want to make this soup vegetarian, you can leave out the chopped roast beef and use vegetable broth instead of beef broth. Some people like to add potatoes to this soup but I decided to use one cup of pot barley which would provide enough heartiness. You can also use pearl barley instead of pot barley. 

The directions provided below are for making the soup on the stove. I used an electric pressure cooker instead and used the sauté feature before cooking it for 18 minutes under medium high pressure. 

This soup will be a welcomed meal for lunches over the coming week.

Garlic, onions, celery, carrots and mushrooms sautéing.
INGREDIENTS:

2 tbsp oil
1 large onion, chopped
2 stalks celery, chopped
1 clove garlic, minced

3 medium carrots, peeled and chopped
2 cups mushrooms, sliced
8 cups of beef broth or water
1 cup barley, pearl or pot

1 to 2 cups of leftover roast beef, chopped
1/2 tsp dried thyme
salt and pepper to taste
1 handful of fresh parsley, chopped

DIRECTIONS: 
Heat the oil on medium heat in a large pot. Add onions, celery, carrots, mushrooms and garlic and sauté for about five minutes until softened. Add the remaining ingredients. Bring to a boil and then allow to simmer, covered with the lid for an hour. You can simmer the soup longer if desired. If the soup is too thick, add a bit of water. Adjust seasonings if required. Makes about 8 to 10 servings.