Tuesday, August 30, 2011

MIXED BERRY JAM

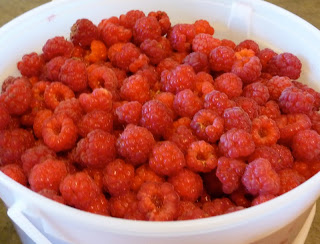
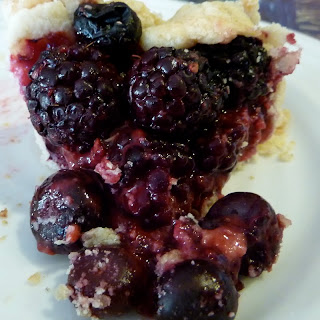
With the abundance of berries including cherries from the backyard trees, I thought I would make mixed berry jam.  We have bought mixed berry jam at Costco but I thought I could make great jam.  It is easy to make mixed berry jam.  When I make jams, jellies, relishes or pickles and need to use warm sterilized jars, I sterilize the jars in the oven at 200 degrees F for at least 10 minutes.  I also gently boil the lids in a small pot of water to sterilize them.

Cooking the berry jam.

Jars cooling on the counter. 

INGREDIENTS:
2 cups crushed strawberries
2 cups crushed raspberries or cherries
2 cups blueberries
1/3 cup water
4 cups sugar
1 box Certo light or regular pectin crystals

DIRECTIONS:

Combine pectin with 1/4 cup of sugar in a small bowl.  In a large pot add the berries and water.  Stir the pectin mixture into the fruit.  Cook over high heat until the mixture comes to a full boil.  Stir in the remaining sugar.  Continue to cook and stir over high heat until the mixture comes to a full rolling boil.  Boil hard for one minute stirring constantly.  Remove from heat. 

Stir and skim the foam for five minutes.  Pour into warm sterilized jars filling up to 1/4 inch from the rim.  Seal while hot with warm sterilized lids.  Makes about six to seven - 250 mls jars.  Adapted from www.kraftcanada.com

Saturday, August 27, 2011

SPROUTED BEAN TRIO SALAD

While recently at Costco I came across a package along one of the aisles that caught my eye.  It is a sprouted bean trio consisting of green lentils, adzucki and mung beans.  These beans are essentially sprouted and dehydrated and when you go to cook them at home, the cooking time is about 15 minutes.  Being able to cook dried beans in 15 minutes was something that I wanted to try out.   There was a recipe on the back of the package for a bean salad which was fairly simple to make.  The recipe follows these pictures.  You can use these cooked beans in a variety of ways including salads, spreads, soups, mixing with rice or barley to create salads or just by themselves.  I liked the results from cooking these sprouted beans and one of the advantages of using these beans over canned beans is that there is no salt.


What the package looks like. 

The bean salad ready for sampling.

INGREDIENTS:

1 cup of dried beans
2/3 cup fresh parsley, chopped
1/2 cup peeled and diced cucumber
1 green onion, diced
3 tbsp olive oil
2 tbsp lemon juice
1/2 tsp ground cumin
salt and pepper to taste

DIRECTIONS:

Cook dried beans according to cooking instructions.  Drain the beans and let cool.  Combine the beans, parsley, cucumber and onion in a medium sized  bowl.  In a small bowl, mix the oil, lemon juice, cumin and salt and pepper.  Add to the bean salad.  Toss well.  Serves 4.

Wednesday, August 24, 2011

CHERRY JELLY

Making jelly can be easy or hard depending on the equipment you have.  A dear friend of mine decided she was getting too old to fuss with making jams and jellies and so she loaned to me, on a permanent basis, her steam juice extractor.   It is a wonderful toy to use to make juice.  With the bumper crop of cherries in my backyard, I decided to make cherry jelly.

There are a number of methods you can use to get the juice from the cherries.  Using the steam extractor made it pretty easy to extract the cherry juice.

The brand name of the steam juice extractor I used to get the juice from the cherries. 

Set up on the stove to extract the juice.

The cherries just need to be washed.  You can leave the stems on and of course you don't have to pit the cherries. 

The cherry juice in the tubing used to drain the juice out of the pot. 

What the cherry juice looked like. 

I needed to measure the quantity of juice being extracted.

An inside view of the juice collected from steaming the cherries.

The finished product. 
INGREDIENTS:


3 1/2 cups of cherry juice
3 1/2 cups of sugar
1 tsp almond flavouring
1 box of certo pectin crystals

DIRECTIONS:


Add the juice to a large saucepan.  Add the pectin crystals and almond flavouring and mix well.  Bring the fruit to a rolling boil on high heat.  Stir in the sugar.  Return to a full rolling boil and boil for one minute, stirring constantly.   Remove from heat.  Stir and remove foam for the next five minutes.

Pour immediately into warm sterilized jars filling to within 1/4 inch from the rim.  Seal with warm sterilized lids.  Let stand at room temperature overnight before storing away.  Makes about 6 - 250 ml jars.  Adapted from www.kraft canada.com

Sunday, August 21, 2011

MUSTARD BEAN RELISH/PICKLES

We had a great crop of green and yellow beans this summer.  In deciding what to do with all of the beans, the DH asked if I could make mustard bean pickles which is also like a relish.  His mom had made these pickles years ago and he liked the flavour and taste.  The DH found an old recipe book (The Purity Cookbook) belonging to his mom and it had a recipe for these mustard pickles.  I also found this recipe on an internet site.

The recipe calls for 6 quarts of beans or 15 cups.  I thought that was a lot of beans and was worried that I would have too many beans.  Once I started to mix the mustard sauce with the beans in a large pot, my worries were put to rest.  It is a great recipe and the DH sampled a few spoonfuls and said that it tasted great and was similar to what his mom had made.

Beans placed in a pot to boil. 

Mustard sauce cooking and thickening. 

Beans added to the mustard sauce and well mixed.

Canning jars cooling on the kitchen counter.


Wash and trim ends from a six  quart basket young yellow or green string beans.
Cut into 1" lengths. This amount will measure about 15 cups prepared beans.
Cook in boiling salted (salt is optional) water until just tender.  Drain.

MUSTARD SAUCE
Mix together in a large saucepan or kettle:
2-1/2 cups sugar
2 tsp salt
1/2 cup dry mustard
1/2 cup all-purpose flour

Blend into the dry ingredients:
1/2 cup vinegar

In a medium size saucepan, heat to boiling point:
2-1/2 cups vinegar
1 tbsp celery seeds

Stir this hot liquid slowly into flour mixture.

Place the saucepan or kettle over moderate heat, stirring until thickened and smooth (about 5 minutes).  Add drained beans; bring mixture to boiling point.

Ladle into hot sterilized jars, seal and let cool. Store in a dark, dry, cool place.  Makes about 9 jars (250 ml).


Thursday, August 18, 2011

WILD RICE SALAD

I like wild rice but I don't tend to make it as often as I would like.  Cooking wild rice takes longer than white or brown rice.  I also buy it in bulk from some of the local health food stores and it is not preprocessed so the cooking time is longer.  There are so many things that you can add to wild rice in making a salad - nuts, dried fruit, crunchy vegetables and or cooked vegetables such as peas or corn.

The salad is very good and what I like about it is the combination of the nuttiness of the wild rice combined with the almonds, raisins, parsley, cider vinegar and apple juice.  I would recommend this salad.

Cooked wild rice.

Rains and chopped almonds added to rice.

All of the ingredients have been added except for the dressing.

Ready to serve.
INGREDIENTS:
1 cup uncooked wild rice
3 cups water
1/4 cup chopped toasted almonds or pecans
1 stalk celery, diced
1 green onion, chopped
1/3 cup raisins, dried apricots, dried apple or dried cranberries
1/4 cup fresh parsley, chopped
2 tbsp olive oil
2 tbsp cider vinegar
1 tbsp apple juice
salt and pepper to taste

DIRECTIONS:
Heat the rice and the water in a medium size pot to a boil and then simmer for 55 to 60 minutes.  Drain any excess water.  Let cool.  Place the rice in a bowl and add the celery, green onion, nuts, dried fruit and parsley.  Mix the salad.  In a separate container whisk the oil, vinegar and juice.  Add the dressing to the salad and combine.  Add salt and pepper if desired.  Keep in the fridge until ready to serve.  Serves 4 to 5.

Monday, August 15, 2011

CUCUMBER RELISH

We had a great crop of cucumbers this year.  There are only so many cucumbers you can eat.  We have given some to friends, I have made ice cream pail fridge pickles and still had a number to use.  I found a recipe for cucumber relish in a cookbook that my mother-in-law used.  It is a book produced by a flour company, Purity Flour, and the book is over 50 years old.  The recipe calls for minced and diced vegetables.  I used a food processor with the grating blade and just put everything through the grater.  It worked quite well.  If I had to chop everything by hand it would have taken awhile to prepare all of the vegetables.  The relish tastes great and I plan to use this relish with meat, added as a condiment with mayonnaise when making chopped egg or tuna and even with cream cheese on a cracker.  The DH says that this cucumber relish is far superior to the relish that I buy at the grocery store.

Salt added to shredded vegetables and ready to sit overnight.

Draining in a big colander over the kitchen sink.  I left it draining for over an hour.

Cooking after adding the sugar, vinegar and spices.

Almost a dozen jars (500 ml) filled with relish. 

INGREDIENTS AND DIRECTIONS:

Into a large bowl, wash and prepare the following:

8 cups peeled, minced cucumbers (8 to 10 large cucumbers)
3 cups peeled, minced onions (8 medium size)
4 cups minced green tomatoes (6 large)
2 cups minced pepper (green, red, yellow)
4 cups diced celery

Sprinkle with
1/3 cup coarse salt

Let stand overnight.  Cover loosely with saran wrap.  In the morning drain off the liquid.  I use a very large colander  and let it drain for over an hour.  Place the drained vegetables in a large pot and add

4 cups white vinegar
3 cups sugar

Cook gently over medium heat for 15 minutes stirring frequently.  In a separate small bowl, combine

½ cup flour
1 tsp turmeric
1 tbsp celery seeds
1 tbsp mustard seeds

Add 1 cup vinegar to this small bowl and mix the ingredients to make a paste.

Add the paste to the hot cucumber mixture and stir until it is thickened and boiling. Cook at a low heat for 10 minutes and then ladle into hot sterilized jars and seal with the canning lids.  Place the jars in the oven at 200 degrees F to continue with the sealing process for 20 minutes.  Remove and let cool before storing away for future use.  Makes almost a dozen (500 ml) full jars. 

Saturday, August 13, 2011

LEMON ROSEMARY ZUCCHINI LOAF


I saw this recipe on the Simply Recipes internet site.   I made a few changes to the recipe.  The combination of zucchini, lemon and rosemary was interesting and I thought that it would have a very nice flavour.  The rosemary flavour is very subtle.  The loaf does have a nice flavour based on multiple sampling and the DH really enjoyed this loaf.  I used zucchini and rosemary from the garden and 100 percent whole wheat flour.  I didn't add the salt to the recipe.  When I grate zucchini I tend to pack it done in the measuring cup and then I let it sit in a bowl for awhile as there will be excess moisture which I like to drain off before adding it to the recipe.  Instead of making two loaves you can make muffins instead.  The recipe is definitely a keeper.
 
Whisking the eggs, sugar, margarine and oil.

Zucchini and lemon zest added to the batter.

Whisking the zucchini and zest into the batter.

Adding the dry ingredients.

Whisking everything together.

Ready for the oven.

Cooling on racks.

Ready for sampling.
    
INGREDIENTS:
         3 cups flour
         2 tsp baking soda
         1/2 tsp baking powder
         2 Tbsp minced fresh rosemary
         2 eggs
         1/2 cup melted unsalted butter or margarine
         1/4 cup olive oil
         1/2 tsp salt (omit if using salted butter)
         1 1/4 cup sugar or 1 cup splenda
         2 Tbsp lemon zest
         3 cups grated zucchini 

DIRECTIONS:
1 Preheat oven to 350F. Prepare two 4x9-inch loaf pans, either coating with butter or spraying with baking spray.
2 In a large bowl, whisk together the flour, baking soda, baking powder, salt, and rosemary.
3 Beat the eggs in a mixer (or by hand) until frothy. Beat in the sugar. Beat in the melted butter and olive oil. Stir in the lemon zest and grated zucchini.
4 Add the dry ingredients to the wet.
5 Divide batter/dough into two loaf pans. Bake in a 350°F oven for 45 to 50 minutes. Test after 40 minutes. 
6 Remove from the oven. Let cool for a few minutes and then remove the loaves from their pans to cool on a rack.
Yield: Makes two loaves.  Adapted from Simply Recipes

Wednesday, August 10, 2011

ZUCCHINI SPAGHETTI

With the zucchini plant in the garden producing abundant zucchinis, I like to shred a number of them using the food processor for freezing in two cup portions.  I use these two cup portions during the fall and winter for soups and loaves.  I decided to use several cups of shredded zucchini as a substitute for spaghetti and add it to sauteed vegetables to make a pasta-less dish.  I quite enjoyed the dish and though it didn't have that carbo loading sensation to it as compared to real pasta, it is quite filling.  In cooking the vegetables, it is important to not overcook them, especially the zucchini, as you want to retain the shape of all the vegetables and not have mushy vegetables.

Onion, garlic, pepper and mushrooms cooking in a pan.

Shredded zucchini, tomatoes and basil added to the pan.

Vegetables being sauteed.

Ready to serve.

INGREDIENTS:
2 tbsp olive oil
1 clove garlic, minced
1 onion, chopped
1 small red or orange pepper, diced
5 to 6 mushrooms, each sliced into several pieces
3 cups of shredded zucchini
6 grape of cherry tomatoes, halved
1/4 cup fresh basil, sliced into strips
salt and pepper to taste

DIRECTIONS:


Heat the oil on medium heat in a medium size frying pan and add the onions, pepper and onions.  Saute on low heat for 3 to 5 minutes.  Add the mushrooms and cook for another 2 minutes.  Add the zucchini, tomatoes and basil.  Cook for another 3 to 5 minutes or until the zucchini is soft but not overcooked.   Add salt and pepper to taste.  Serves 3 to 4.
 

Sunday, August 7, 2011

NEVER FAIL PASTRY FOR CHERRY PIE


With one cherry tree being ready to pick while the cherries on the second tree were not quite ready, I have been steadily processing cherries.   After washing the cherries, I start to pit them.  In a blog that I posted last year, I provided pictures of the cherry pitter.  It is a manual pitter and does one cherry at a time.  Instead of making jam, I decided to pit all of the cherries that I had picked one week to make a pie and freeze the rest in four cup portions.  With lots of arm action, almost 14 cups of pitted cherries were processed.  

In making the pie I looked for my standby pie crust recipe on the Crisco container.  The recipe on the back didn't include vinegar and egg but the standard water, flour and shortening.   I went looking for a new pastry recipe and found one on allrecipes.com.  The pie crust and pie turned out wonderful.  The pie crust was flaky and tender.  The pastry includes an egg yolk, sugar, salt, vanilla extract and baking powder.  I never have used baking powder before in a pie crust.  The DH who is an expert on pies, says the pie crust and the pie was pretty good. 


Vegetable shortening added to flour mixture.


Mixing up the liquid ingredients.

Shortening is cut into the flour mixture.

I cut the dough into two halves and wrap each half with saran wrap prior to chilling.

I roll the dough out on parchment paper.  You can also use wax paper.  Less mess to clean up on the counter.

Rolling out the dough.

I like using deep dish pie plates.

To make the pie filling I mix 4 cups of pitted cherries with 1 cup of sugar, 3 tbsp of small minute tapioca and 1 tsp almond extract.

Cherry pie filling added to pie shell.

Out of the oven after baking for 40 minutes.  First 10 minutes at 425 degrees F and then 30 minutes at 350 degrees.

The first slice eaten by the DH.

 Yields 1 double crust

Ingredients
2 cups all-purpose flour
1 teaspoon white sugar
1/4 teaspoon salt
1 teaspoon baking powder
1 cup shortening
1/3 cup cold water
1 egg yolk
1 teaspoon vanilla extract
1 teaspoon distilled white vinegar

Directions
In a medium bowl, mix together flour, sugar, baking powder, and salt. Cut in shortening until mixture resembles coarse meal.
In a separate bowl, whisk together water, egg yolk, vanilla extract, and vinegar. Stir into flour mixture and knead dough briefly, just until smooth. Allow to rest 15 minutes before rolling out. Place in the freezer for 15 or 20 minutes. Pastry is easier to work with when chilled. Can be stored in refrigerator for up to 1 week.

Pastry recipe from allrecipes.com

Thursday, August 4, 2011

UPDATE - THE EAT-CLEAN DIET STRIPPED

Over a month ago I started to follow Tosca Reno's eating clean food plan in her book "The Eat-Clean Diet Stripped".  This food plan is for trying to take off the last 10 pounds.  I wrote about this diet and the author
when I first started the program.

Did I lose 10 pounds?  No.  Was I expecting to lose 10 pounds?  No.  Based on what I know about my body, my changing hormonal profile and past experiences, I was hoping for maybe a five pound loss.  I ended up with about a two pound loss.

I stayed on the plan for the month, followed it pretty well and had a few instances where I exceeded my daily carb allocation.  Eating clean does make me feel pretty good. What I did learn is that for me to lose weight, I need to limit my starchy carbs and having two servings a day is a better option for me in order to lose weight.  Of course I need to watch my sugar intake, such as chocolate and ice cream.  My cheese consumption has also diminished and recently I bought some soft goat cheese and sheep feta to use in salads or with omelets.  Staying away from the cheddar, swiss cheese and other full fat cheese is a better choice for me.

Today I had bread, 2 thin slices of multigrain bread with smoked salmon.  It tasted really good.  Aside from a thin slice of pizza this past month, it had been a month since I have indulged in any crunchy, freshly baked bread.  I do miss bread and so for the long term I plan to continue limiting the amount of starchy carbs and I will have bread as part of my daily starchy carbs but not on a daily basis.  My journey in losing these ten pounds will take months and it will be a bit like chipping away at a cement block, a slow methodical process.


Tuesday, August 2, 2011

RASPBERRY PIE

Not far from where we live is a u-pick fruit farm.  In the past we have picked sour cherries (before we got our own trees), strawberries and saskatoons.  This year we picked raspberries, lots of raspberries.  Three large ice cream pail of berries.  I couldn't decide if we should pick three or four containers but I am happy we picked just three after washing, picking through the berries for ones that needed to be discarded and then measuring into the quantities for bagging and freezing.  We froze numerous bags for smoothies, adding to yogurt, making fruit crisps and other baking delights.

The raspberry pie turned out really well.  Using the crust recipe from the sour cherry pie, I didn't have any trouble rolling out the crust.  In fact I had a bit of dough leftover so I made a small fruit pie in a small ramekin using blueberries and blackberries.  Both pies were a hit with the DH.

The recipe for making the raspberry pie is simple.  You need to make the recipe for a double pie crust and the filling is 4 heaping cups of raspberries mixed with 2 tbsp of corn starch and half a cup of sugar.  Bake at 425 degrees F for the first ten minutes and then 27 to 30 minutes at 350 degrees F.

Picked raspberries in an ice cream pail container. 

Bagged and ready to be put in the freezer.

Raspberry pie filling  - berries, sugar and corn starch.

Pie ready to go into the oven.

Finished baking after 37 minutes at 350 degrees F.

Side view of slice for the DH.

Another view of the pie.

Blueberries and blackberries used with leftover dough and baked in a small ramekin.