Showing posts with label Baking. Show all posts

Saturday, May 5, 2018

CHERRY CRISP WITH A NUT DATE TOPPING

In looking to make a dessert that is somewhat paleo and to use some of the frozen sour cherries from last summer, I decided to make cherry crisp with a different topping than what I have tried before. I combined recipes from previous posts and a topping from paleorunningmomma. The topping is different as it uses mainly dates and walnuts with a small amount of almond flour. The dates provide a nice sweetness to the topping.

For sugar in the filling, I used erythritol which is a natural sweetener and has a low glycemic index. I used tapioca starch in the filling as the cherries were frozen and I know they would have a lot of juice once thawed. After baking it, I should have added more tapioca starch than two and a half tablespoons. I would have preferred it to have less juice once baked. I had both pecans and walnuts in the pantry and decided to use walnuts. 

This recipe is a nice change from an almond flour based topping. 
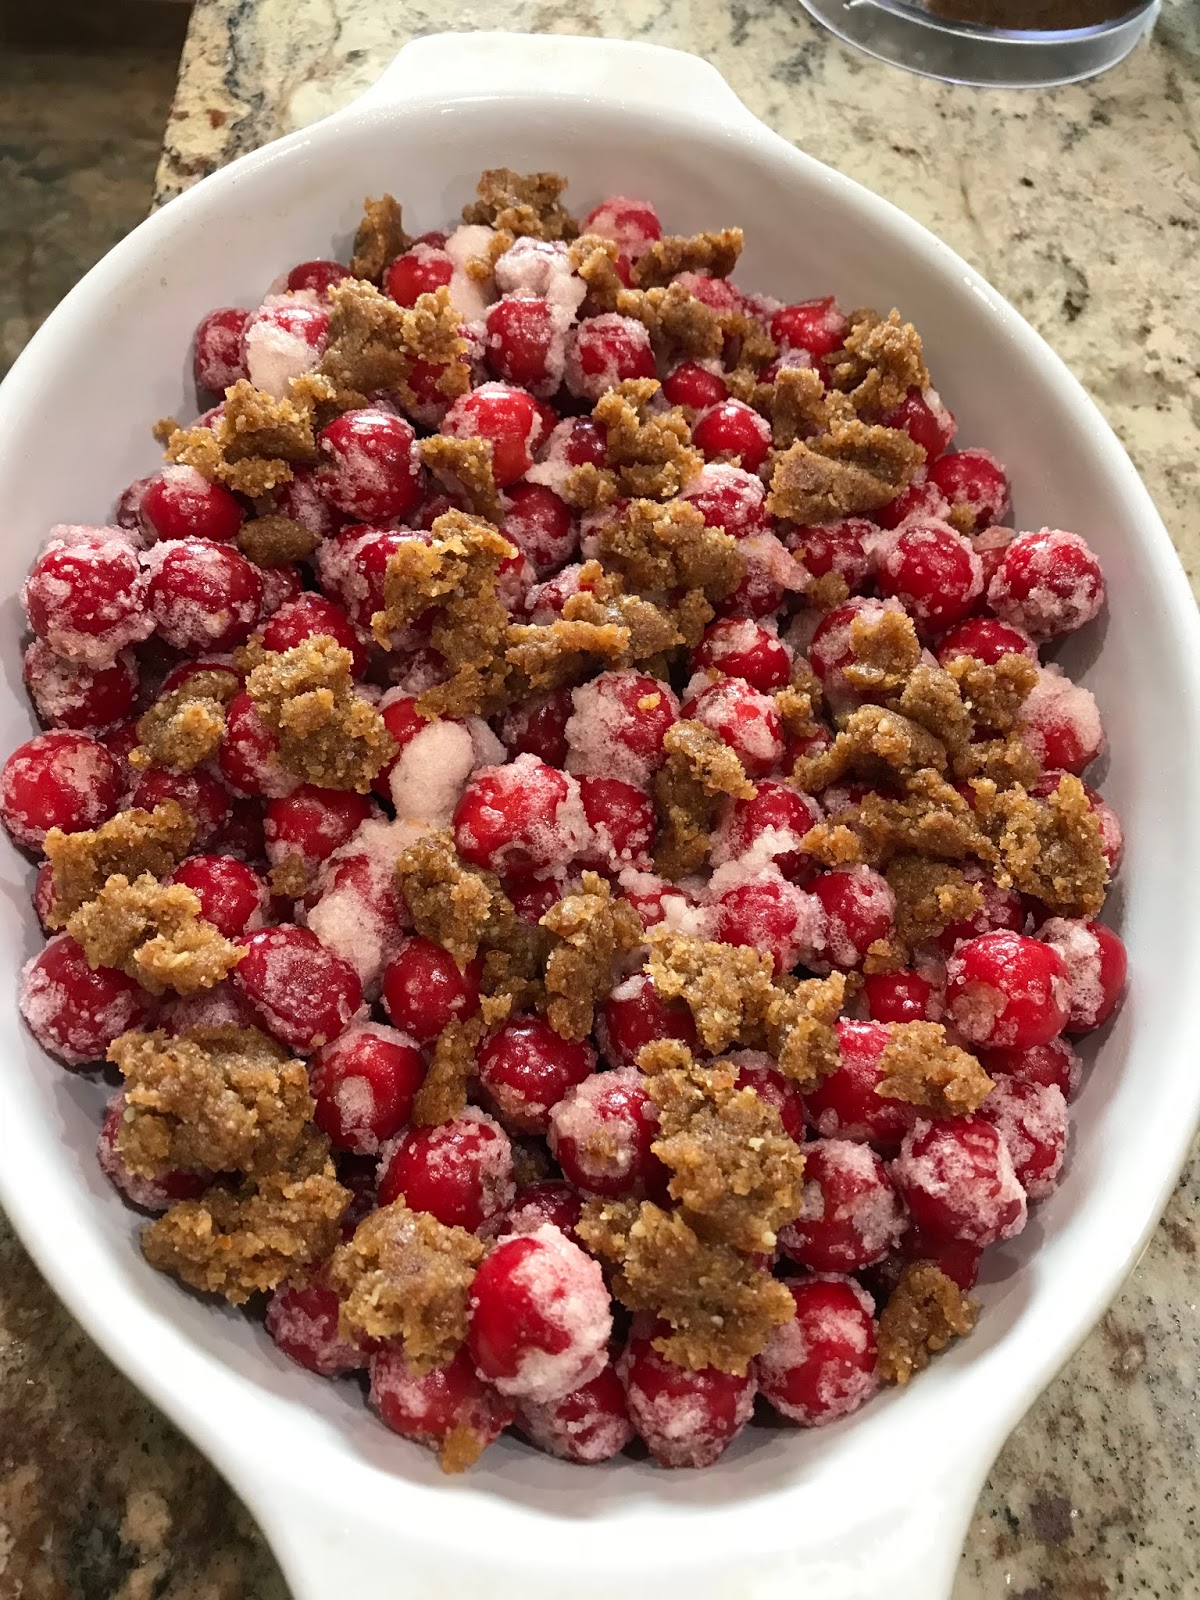
Starting to add the topping.

Crisp covered with topping and ready to bake.

Cooling off after baking.

DIRECTIONS:

Filling:

4 cups of fresh or frozen pitted cherries
¼ cup white sugar or splenda
¼ cup brown sugar
2 tsp almond extract
1/8 tsp salt
2 ½ tbsp ground almond flour or tapioca starch

Topping:

1 cup pitted dates softened*
1 cup raw walnuts or pecans
1/3 cup almond flour
1/2 tsp pure vanilla extract

DIRECTIONS:

  1. Preheat your oven to 350 degrees F.
  2. To make the topping, combine the softened dates, walnuts, almond flour and vanilla in a food processor and process on high until a crumbly paste forms.
  3. Place the cherries in a large bowl and add the sugar, almond extract, salt and almond flour or tapioca starch. Combine well.
  4. Grease a 1.5 quart baking dish and add the filling mixture. 
  5. Generously sprinkle the crumb topping over the berries using the entire mixture.
  6. Cover the top with aluminum foil and bake in the preheated oven for 20 to 25 minutes, remove the aluminum foil and continue to bake another 15 to 20 minutes until the fruit is hot and bubbly and the top begins to brown and turn crispy. If using frozen cherries, you will have to gauge the time as it might need more time to bake. I baked it for about 50 minutes.
  7. Remove from oven, allow to cool and serve warm. Store leftovers covered in the refrigerator. 
  8. Serves 6 to 8 depending on appetites. 

Recipe Notes
*To soften the dates, soak them in a small amount of hot water for one to two minutes, then drain.


Recipe is a combination of ones already posted on this blog and paleorunningmomma for the topping.

Friday, April 20, 2018

PALEO POPPY SEED LEMON LOAF

Recently I bought a cookbook called "The Plant Paradox" by Steven Gundry. It has a number of interesting recipes. All of the recipes are gut friendly and lectin-free. The cookbook includes some great looking food and includes a variety of different foods. This recipe is from the cookbook.

This poppy seed loaf looked good and the DH asked if I would make this recipe. One ingredient that I hadn't used before is erythritol. It is a natural sweetener and doesn't spike your blood sugar. You can bake with it. It is sometimes sold under the brand name Swerve. I bought the sweetener just as erythritol and found it at the local health food store. Instead of using a loaf pan I used a round cake pan. For the lemon juice and zest I did something a bit different. Last fall I had a large bag of lemons which were not getting used and I didn't want to let them spoil. I grated the lemons to get the zest and combined the zest with the pulp of the lemons in the food processor. I pureed it and froze the mixture in ice cube trays. Once they froze I transferred them to a freezer bag. I have been using these frozen lemon cubes in recipes that call for juice and zest.

The loaf turned out fine and tastes good. Using almond flour and coconut flour creates a different texture to the loaf than using wheat flour but it holds together and is a good alternative to wheat flour.

Batter in the cake pan ready to go into the oven.

Just out of the oven.

Ready to sample.

Another angle to see the loaf slice.


INGREDIENTS:

1.5 cups almond flour
1/4 cup coconut flour
1/2 tsp salt
1 tsp baking soda

3 eggs
1/2 cup erythritol or Swerve (brand name)
1/4 cup avocado oil
juice from 3 lemons
zest of 2 lemons
1/4 cup unsweetened coconut milk
1 tsp vanilla extract
2 tbsp poppy seeds

DIRECTIONS:

1. Preheat the oven to 350 degrees F. 
2. Line a loaf pan with parchment paper.
3. In a large mixing bowl, mix together the flours, salt and soda.
4. In a separate smaller bowl, whisk the eggs and then add the erythritol, lemon juice and zest, coconut milk and vanilla extract. Whisk the wet ingredients and combine well.
5. Add the wet ingredients into the dry ingredients and combine well.  Fold in the poppy seeds. 
6. Transfer to the lined loaf pan and bake for 35 to 40 minutes or until a toothpick inserted into the middle of the loaf comes out clean.
7. Let cool for a few minutes before removing the loaf to a cooling rack. It can be served warm or at room temperature. Makes 6 to 8 servings.  

Sunday, October 1, 2017

APPLE SCONES WITH OAT FLOUR

I recently bought a bag of oat flour and since it wasn't too hot outside, I was thinking about baking something that could be consumed either for breakfast or as a treat. I also had gone out for lunch with friends and knew that I was not interested in a full supper as I had a big bowl of pho chicken soup for lunch. 

After looking at some cookbooks and the internet, I decided to make scones. I like scones but not too overly sweet. I used an apple as the fruit in these scones but you could also use pear, banana or berries. The recipe calls for cane or coconut sugar but you can use regular sugar. I used cane sugar. The coconut oil was already soft in the large jar and I didn't need to cut it into the flour with a pastry cutter. I used a hard mixing spoon. Using soft coconut oil made the flour mixture less crumbly, too sticky and more of a blended mixture. I think because of this, I added a bit more oat flour to the dough when I was separating the dough into two halves and shaping it into two round circles. I left the two rounds of dough with each scored into six pieces. I didn't separate the pieces to bake. 

The scones turned out fine, a bit crumbly as I used gluten free certified oat flour and rolled oats which is not the same as baking with flour. They are light and not too sweet. I like the combination of apple and cardamon.


Before baking - two circles of dough scored into 6 pieces per round.

 
Ready for sampling!
INGREDIENTS:

1 cup oat flour
1 cup old-fashioned or quick-cooking oats
⅓ cup natural cane sugar or coconut sugar
2-1/4 tsp baking powder
1 tsp ground cardamom
¼ tsp fine sea salt
⅓ cup solid coconut oil, cut into chunks
1 large egg
2 tbsp milk (dairy or nondairy)
1-1/4 cups chopped apple, option to peel it

INSTRUCTIONS:

1. Preheat oven to 400°F. Line a large baking sheet with parchment paper.

2. In a large bowl, whisk together oat flour, oats, sugar, baking powder, cardamom and salt. Using a pastry blender or two knives, cut in coconut oil until crumbly.

3. In a small bowl, whisk the egg and milk. Add to the flour mixture and stir until just blended; fold in apples.

4. Turn dough out onto a surface lightly dusted with oat flour. Gently pat into two 6-inch circles, about ½ inch thick. Cut each circle into 6 wedges and place 2 inches apart on prepared baking sheet.

5. Bake in preheated oven for 17 to 22 minutes or until golden brown and firm to the touch. Transfer scones to a wire rack and let cool for 5 minutes. Serve warm or let cool completely.


Adapted from powerhungry.com

Monday, March 13, 2017

BANANA COCONUT LOAF

Recently I saw this recipe from Karen Barnaby in my local newspaper and it looked so delicious that I had to make it.  It is a great combination of bananas and coconut.  I made a few changes to the recipe.  I used Splenda instead of sugar and almond milk instead of full fat coconut milk.  I baked the loaf in a silicon loaf pan, didn't line it with parchment paper and it took 60 minutes to bake in a convection oven.  The loaf turned out to be delicious and was enjoyed by the myself and the DH.


A wedge of the loaf ready for sampling.


You can see the sliced banana and coconut sprinkled on top. 

INGREDIENTS:


1½ cups  all-purpose flour
1 cup shredded unsweetened coconut, divided 
1 tsp baking soda
1 tsp sea salt
½ cup coconut oil, melted
½ cup granulated sugar
½ cup light brown sugar, packed
2 large eggs
1 cup mashed, ripe bananas, (3-4)
½ cup full-fat coconut milk
2 tsp pure vanilla extract
1 ripe banana sliced into 1/4 inch slices

DIRECTIONS:

1. Heat oven to 350 degrees F . Grease a 9 x 5-inch (23 x 13 cm), loaf pan. Line the bottom and sides with parchment paper. 
2. Whisk together flour, ¾ cup coconut, baking soda, and salt. Set aside.
3. Beat the coconut oil and sugars until well combined. Add eggs, one at a time, beating well after each.  Beat in bananas, coconut milk and vanilla
4. Add flour mixture to banana mixture and mix until just combined. Scrape into the prepared pan and top with the remaining 1/4 cup coconut and banana slices. 
5. Bake for 70-90 minutes. Test readiness by inserting a toothpick into the centre and it comes out with moist crumbs.  Let it cool before slicing.

Sunday, August 9, 2015

SOFT PRETZELS

A couple of weeks ago I saw that a friend on Facebook had a photo of soft pretzels that she had made that day.  They looked very good.  I decided to try making pretzels as I never had made them before.  They are not difficult to make but the recipe requires several steps as they are boiled before they are baked.  The shape of my pretzels are not perfect, they look more like a roll than a pretzel, but they tasted really good.  This is a recipe that I will be making again.  The DH quite enjoyed them.  I did freeze about half of them for future eating.

Rolled into pretzels and getting ready to put into a pot of boiling water.

Ready for sampling.

INGREDIENTS:

1 tbsp yeast
1 tbsp sugar
2 cups warm water
1 cup flour
1 tbsp salt
4 cups of flour
1 egg, beaten in a small cup with 1 tbsp water (egg wash)

small roasting pan filled half way with water
1 tbsp baking soda

DIRECTIONS:

Into a medium size bowl or a food processor/mix master bowl, add the yeast, sugar and 2 cups of water.  Gently mix the ingredients and then let it rest for a few minutes until the yeast is foamy.  Add the one cup of flour and using a mix spoon or a dough hook, mix the flour into the water yeast mixture.  Add the rest of the flour and the salt, mix the ingredients and either knead by hand on a smooth surface or use the dough hook and knead for about 4 to 5 minutes.  Oil a medium size bowl and place the dough into the bowl.  Roll the dough around until it is covered with the oil.  Cover, place the bowl out of the draft, and let it rise for about an hour.

Gently punch the dough down and knead for a minute.  Divide the dough up into sixteen pieces and roll out each piece into a 14 inch length rope.  Make the rope into a U shape and cross the ends over each other and press the ends into the bottom part of the U so it looks like a pretzel.  Place each pretzel onto an oiled cookie sheet or a parchment lined cookie sheet.  Let the dough rest for 15 minutes.  

Add the baking soda to the roasting pan and boil the water in the roaster to a rolling boil on top of the stove.  You need to use a roasting pan that can sit on a heat element on top of the stove.  Using a flat slotted spoon, add a few of the pretzels at a time to the roasting pan and let the pretzels boil for 30 seconds.  Remove each pretzel using the slotted spoon back to the cookie sheet.


Once all of the pretzels have been boiled, brush each pretzel with the egg wash and sprinkle with salt.  Place the cookie sheets into a preheated oven at 450 degrees F for 12 to 15 minutes.  Cool on a wire rack.  Makes 16 pretzels.

Sunday, May 25, 2014

GLUTEN FREE NUT & SEED BREAD

A friend of mine was recommending this bread she makes and she sent me the internet link to get the recipe.  It is a gluten free bread made with oats, flax, nuts and seeds as the main ingredients.  What is great about the bread is that you mix it up in the loaf pan.  It needs to sit for at least two hours and can sit overnight before it is baked.

The blog site where I found this recipe is called My new roots.   The author of the blog site is Sarah Britton and she is based in Copenhagen, Denmark.  I have spent a little bit of time looking at the various recipes and the photographs are stunning.  She is a holistic nutritionist and received her certification attending a one year program in Toronto, Canada.   Using a good camera does make a difference with the quality of your photographs.

I am providing the original recipe from the blog site.  I made some modifications.  I added an egg to the wet mixture.  I didn't have flax seeds but had ground flax so I used the same amount and added 1/2 cup of ground flax.  You will have to add at least half a cup to a cup more water to the recipe as ground flax seed is more absorbing.  I don't have a silicon loaf pan and used instead a regular non-stick bread loaf pan.  I baked the bread for about 50 minutes in the loaf pan.  I am tempted to buy a silicon loaf pan as one can never have enough gadgets and baking tools in your kitchen.  I mixed up the loaf at suppertime and let it sit overnight on the counter, covered with plastic wrap and baked it in the morning.  You need to let the bread cool on a rack before slicing it.  For breakfast this morning, I toasted two slices and put a piece of cheese on top.  The bread is very delicious and filling.


Dry ingredients mixed in the non-stick pan

The wet and dry ingredients have just been mixed and now it will sit to thicken.

Ready to sample.

The Life-Changing Loaf of Bread
Makes 1 loaf

INGREDIENTS:
1 cup  sunflower seeds
½ cup flax seeds
½ cup hazelnuts or almonds
1 ½ cups rolled oats
2 tbsp chia seeds
4 tbsp psyllium seed husks (3 tbsp if using psyllium husk powder)
1 tsp fine grain sea salt (add ½ tsp. if using coarse salt)
1 tbsp maple syrup (for sugar-free diets, use a pinch of stevia)
3 tbsp melted coconut oil or ghee
1 ½ cups water

DIRECTIONS:

1. In a flexible, silicon loaf pan combine all dry ingredients, stirring well.  Whisk maple syrup, oil and water together in a measuring cup.  Add this to the dry ingredients and mix very well until everything is completely soaked and dough becomes very thick (if the dough is too thick to stir, add one or two teaspoons of water until the dough is manageable).  Smooth out the top with the back of a spoon.  Let sit out on the counter for at least 2 hours, or all day or overnight.  To ensure the dough is ready, it should retain its shape even when you pull the sides of the loaf pan away from it it.

2. Preheat oven to 350°F / 175°C.

3. Place loaf pan in the oven on the middle rack, and bake for 20 minutes. Remove bread from loaf pan, place it upside down directly on the rack and bake for another 30-40 minutes. Bread is done when it sounds hollow when tapped. Let cool completely before slicing (difficult, but important).

4. Store bread in a tightly sealed container for up to five days. Freezes well too – slice before freezing for quick and easy toast.


Sunday, January 12, 2014

OATMEAL BANANA LOAF

Banana loaf or banana bread is a popular recipe.  I have a few different recipes, some use oatmeal, some include raisins or other dried fruit and others include chocolate chips.   I had a few ripe bananas so I decided to make this recipe.  Instead of sugar, I used half a cup of splenda.  I also used a combination of raisins and dried cranberries.  This recipe will serve a larger group as the ingredients include 2 cups of flour and over a cup of oatmeal.   The DH and friends enjoyed this loaf.

Ready to go into the oven.

Sampling has started.

OATMEAL BANANA LOAF

INGREDIENTS:

1 1/3 cups quick cooking oats
1 cup all purpose flour
1 cup whole wheat flour
2/3 cup packed brown sugar
2 tsp cinnamon
1 ¼ tsp baking powder
1 ¼ tsp baking soda
2 eggs
2 cups mashed bananas, about 3
½ cup vegetable oil
1 ¼ tsp vanilla
1 cup raisins or dried cranberries or mixture of both

DIRECTIONS:

In a large mixing bowl mix together rolled oats, flour, sugar, cinnamon, baking powder and soda.   In a separate bowl, mix the eggs, bananas, oil and vanilla.  Pour over the dry ingredients.  Add the raisins and stir until moistened.  Pour into a loaf pan or a medium size square pan.  Bake at 350 degrees F for one hour or until a cake tester inserted in the centre comes out clean.   Serves 14 depending on the size of the pieces you cut.


Adapted from www. Canadianliving.com

Saturday, January 14, 2012

APPLE WALNUT LOAF

This recipe for an apple walnut loaf is made with almond meal (ground almonds) instead of flour.  It also doesn't contain added sugar or sweetener.  Instead of baking it in a loaf pan I used a rectangle cake pan.  I did find the loaf to be not sweet enough and I put some honey on the pieces I ate as did the DH.    We both enjoyed the loaf.

Just out of the oven.

First sample of apple walnut loaf. 

Numerous samples.

INGREDIENTS:


2 cups ground almond meal
1 cup chopped walnuts
2 tbsp ground flaxseed
1 tbsp ground cinnamon
2 tsp baking powder
1/2 tsp salt
2 eggs
1 cup unsweetened applesauce
1/2 cup oil
1/4 cup sour cram or coconut milk


DIRECTIONS:


Preheat the oven to 325 degrees F.  In a medium size mixing bowl combine the ground almonds, walnuts, flaxseed, cinnamon, baking powder and salt.  In a second bowl, combine the eggs, applesauce, oil and sour cream.  Pour the egg mixture into the bowl with the dry ingredients.  Mix everything together.  If the mixture is too dry, add a tbsp or two of sour cream or coconut milk.

Pour the batter into a non-stick or greased 9 X 5 inch loaf pan.  Bake for 40 to 45 minutes until a toothpick comes out dry.  Allow to cool in the pan for about 20 minutes and then turn out.  Slice and serve.
Adapted from the Wheat Belly book.

Tuesday, October 11, 2011

GLUTEN FREE BANANA LOAF

With several bananas ripening faster than what we can consume on a daily basis, one of the popular options was to make a banana loaf.  I don't eat bananas on a daily basis but the DH and the dog do.  The dog whose life can be ruled by his stomach, loves bananas.  He will share a banana every morning with the DH.

I did some recipe surfing on the internet and the following recipe is very typical from the numerous sites I visited.   I did find that this gluten free loaf is more crumbly than a loaf made with wheat flour.   I added raisins to the batter and with the sugar, raisins and banana, the loaf was sweet enough.


Saturday, August 13, 2011

LEMON ROSEMARY ZUCCHINI LOAF


I saw this recipe on the Simply Recipes internet site.   I made a few changes to the recipe.  The combination of zucchini, lemon and rosemary was interesting and I thought that it would have a very nice flavour.  The rosemary flavour is very subtle.  The loaf does have a nice flavour based on multiple sampling and the DH really enjoyed this loaf.  I used zucchini and rosemary from the garden and 100 percent whole wheat flour.  I didn't add the salt to the recipe.  When I grate zucchini I tend to pack it done in the measuring cup and then I let it sit in a bowl for awhile as there will be excess moisture which I like to drain off before adding it to the recipe.  Instead of making two loaves you can make muffins instead.  The recipe is definitely a keeper.
 
Whisking the eggs, sugar, margarine and oil.

Zucchini and lemon zest added to the batter.

Whisking the zucchini and zest into the batter.

Adding the dry ingredients.

Whisking everything together.

Ready for the oven.

Cooling on racks.

Ready for sampling.
    
INGREDIENTS:
         3 cups flour
         2 tsp baking soda
         1/2 tsp baking powder
         2 Tbsp minced fresh rosemary
         2 eggs
         1/2 cup melted unsalted butter or margarine
         1/4 cup olive oil
         1/2 tsp salt (omit if using salted butter)
         1 1/4 cup sugar or 1 cup splenda
         2 Tbsp lemon zest
         3 cups grated zucchini 

DIRECTIONS:
1 Preheat oven to 350F. Prepare two 4x9-inch loaf pans, either coating with butter or spraying with baking spray.
2 In a large bowl, whisk together the flour, baking soda, baking powder, salt, and rosemary.
3 Beat the eggs in a mixer (or by hand) until frothy. Beat in the sugar. Beat in the melted butter and olive oil. Stir in the lemon zest and grated zucchini.
4 Add the dry ingredients to the wet.
5 Divide batter/dough into two loaf pans. Bake in a 350°F oven for 45 to 50 minutes. Test after 40 minutes. 
6 Remove from the oven. Let cool for a few minutes and then remove the loaves from their pans to cool on a rack.
Yield: Makes two loaves.  Adapted from Simply Recipes

Sunday, August 7, 2011

NEVER FAIL PASTRY FOR CHERRY PIE


With one cherry tree being ready to pick while the cherries on the second tree were not quite ready, I have been steadily processing cherries.   After washing the cherries, I start to pit them.  In a blog that I posted last year, I provided pictures of the cherry pitter.  It is a manual pitter and does one cherry at a time.  Instead of making jam, I decided to pit all of the cherries that I had picked one week to make a pie and freeze the rest in four cup portions.  With lots of arm action, almost 14 cups of pitted cherries were processed.  

In making the pie I looked for my standby pie crust recipe on the Crisco container.  The recipe on the back didn't include vinegar and egg but the standard water, flour and shortening.   I went looking for a new pastry recipe and found one on allrecipes.com.  The pie crust and pie turned out wonderful.  The pie crust was flaky and tender.  The pastry includes an egg yolk, sugar, salt, vanilla extract and baking powder.  I never have used baking powder before in a pie crust.  The DH who is an expert on pies, says the pie crust and the pie was pretty good. 


Vegetable shortening added to flour mixture.


Mixing up the liquid ingredients.

Shortening is cut into the flour mixture.

I cut the dough into two halves and wrap each half with saran wrap prior to chilling.

I roll the dough out on parchment paper.  You can also use wax paper.  Less mess to clean up on the counter.

Rolling out the dough.

I like using deep dish pie plates.

To make the pie filling I mix 4 cups of pitted cherries with 1 cup of sugar, 3 tbsp of small minute tapioca and 1 tsp almond extract.

Cherry pie filling added to pie shell.

Out of the oven after baking for 40 minutes.  First 10 minutes at 425 degrees F and then 30 minutes at 350 degrees.

The first slice eaten by the DH.

 Yields 1 double crust

Ingredients
2 cups all-purpose flour
1 teaspoon white sugar
1/4 teaspoon salt
1 teaspoon baking powder
1 cup shortening
1/3 cup cold water
1 egg yolk
1 teaspoon vanilla extract
1 teaspoon distilled white vinegar

Directions
In a medium bowl, mix together flour, sugar, baking powder, and salt. Cut in shortening until mixture resembles coarse meal.
In a separate bowl, whisk together water, egg yolk, vanilla extract, and vinegar. Stir into flour mixture and knead dough briefly, just until smooth. Allow to rest 15 minutes before rolling out. Place in the freezer for 15 or 20 minutes. Pastry is easier to work with when chilled. Can be stored in refrigerator for up to 1 week.

Pastry recipe from allrecipes.com