Sunday, August 29, 2010

BAKED HALIBUT WITH ALMONDS

Karen Barnaby is a chef in Vancouver, British Columbia who has written a number of cookbooks.  I have a few of her cookbooks including "The Low-Carb Gourmet".  I went to this cookbook for some inspiration on cooking fresh halibut steaks.  I found several recipes including one that used pine nuts and parmesan as a top coating.  I tweaked the recipe, reduced the portions to serve 2 people and the result was delicious.

Preheat the oven to 400 degrees F. Line a small baking dish with parchment paper.  Place the steaks or fillets on the paper.

Season the fish with salt and pepper. Smear the top of each steak with mayonnaise.

In a small bowl, mix 1/4 cup sliced almonds, 3 tbsp parmesan cheese, 1 tbsp chopped fresh dill and 1 minced glove of garlic. Pat the almond mixture onto the mayonnaise covered halibut, pressing lightly to make it adhere. Bake for about 20 minutes.

It is delicious as it looks.

Saturday, August 28, 2010

BEET BORSCHT

I have been planting beets in the garden for a number of years.  I plant red beets and use the beets to make borscht, relish and also eat them cooked as a side vegetable.  I also like to saute beet greens and eat them with some butter and a dash of vinegar.  I have thought of planting golden beets as I do buy them in the store.  Golden beets of course don't bleed red so they are easier to handle.

Last September, I posted a recipe making borscht without beets (link to post).  My September posting gave background on different borschts that you can make.  The recipe I am profiling today is borscht made with beets.  I also used the stalks and leaves from the beets in the soup and green beans from the garden.  To serve the soup,  I ladle the soup into a bowl and add about 2 tbsp of greek style plain yogurt or sour cream to the bowl.

INGREDIENTS:

2 tbsp olive oil
1 onion, chopped
1 tsp minced garlic
2 stalks of celery, chopped
5 carrots, chopped
2 small potatoes, chopped
1 large handful of green beans, chopped 
1 cup sauerkraut
5 medium sized beets, peeled and chopped
beet leaves and stalks, chopped
5 tomatoes, quartered
1/2 cup fresh dill, finely chopped
10 cups water
3 tsp low salt chicken bouillon
pepper to taste

DIRECTIONS:
In a large stock pot, on medium heat, saute the onions and minced garlic in the olive oil. After a few minutes add the celery and continue to saute for 3 to 4 minutes. Add the carrots, potatoes and beans.  Saute for a few minutes and if the vegetables are sticking, add a bit of water.  Add the water, chicken bouillon, tomatoes, beet leaves and sauerkraut.  Turn the heat to high and once it starts to boil, turn the heat down to simmer.  If the soup is too thick, add a bit more water.  Cook for about 90 minutes and towards the end, add the chopped dill.  If it needs a bit more zing, add more sauerkraut.

Wednesday, August 25, 2010

BEAN SALAD

If I was to compare the variety of salads I eat during winter and summer, I would say that the variety and quantity of salads consumed during summer was much greater.  I have been harvesting green and yellow wax beans from the garden.  Having a big bag of beans in the fridge and more to pick from the garden prompted me to process a pot of beans for freezing.  The beans are boiled in a large pot for about 90 seconds and then the pot is removed from the stove and cold water is poured over the beans.  After they are cooled off, I bag 1.5 to 2 cups of beans per freezer bag.  I will use these frozen beans during the winter as a side vegetable and to add to soups.

I decided to make bean salad for lunch so I kept about 1.5 cups of beans in the pot to cook longer.  A bean salad is simple to make and different vegetables can be added to the salad depending on what you have in the fridge and preferences.

I opened up a 19 ounce can of mixed beans.  I drained the liquid from the can and washed the beans to get rid of excess salt. I put the beans and green beans in a medium size bowl.

I chopped 1/2 pepper (yellow and red), one stalk of celery and two slices of red onion. I added this to the beans.

I took a handful of parsley from the garden, chopped it and added it to the bean salad. 

The finished salad.  It is quite colourful.  For the dressing, I mixed together one tbsp olive oil, two tbsp lemon juice, 1/2 tsp of cumin and some ground pepper.  I added this to the bean salad and tossed everything together.

Sunday, August 22, 2010

SUSHI RICE SALAD


I have been eating sushi for years.  I tend to eat it at restaurants or buy it ready made.  I will eat both raw and cooked fish.  I do have sushi cook books that provide you with picture how-to instructions from making the rice to rolling the sushi rolls.  It does take some preparation time to make sushi from scratch at home.  In Bonnie Stern’s cookbook “Simply Heartsmart” she provides a recipe for sushi salad that I have adapted and tweaked over the years.  I call my salad a sushi rice salad.

The basis of a sushi rice salad is rice, chopped up vegetables, seasoned rice vinegar, nori and ginger.  There are so many variations you can do with this salad – just vegetables or add cooked chicken, shrimp or crab.  I tend to make it with just vegetables.  Why I like this salad is due to the combinations of rice, ginger, seasoned rice vinegar and vegetables.  The salad does not have any oil added to it but I sometimes add a little bit of sesame oil for flavour.  The recipe calls for using sushi rice but you can use other rice.  I use sushi rice because I always have it in the cupboard.  The next time I make it I will try using short grain brown rice to see if there is any difference.  Sushi rice is a Japanese short grain white rice that is quite sticky when cooked.  This recipe also calls for nori which is a sheet of black seaweed and is used to wrap the rice around the fish when making sushi.  Seasoned rice vinegar is made by adding salt and sugar to rice vinegar.  Sometimes seasoned rice vinegar is labeled as sushi vinegar.  I buy seasoned rice vinegar labelled as that or as sushi vinegar.  You can use rice vinegar in this recipe if you don’t have seasoned rice vinegar.
This is the rice that I used to make this recipe.
After the rice is cooked, I put it in a large mixing bowl.  I use a wooden spoon to turn the rice to help cool it off.
The seasoned rice vinegar can also be called sushi seasoning or sushi vinegar.  The vinegar and oil are added to the rice. 
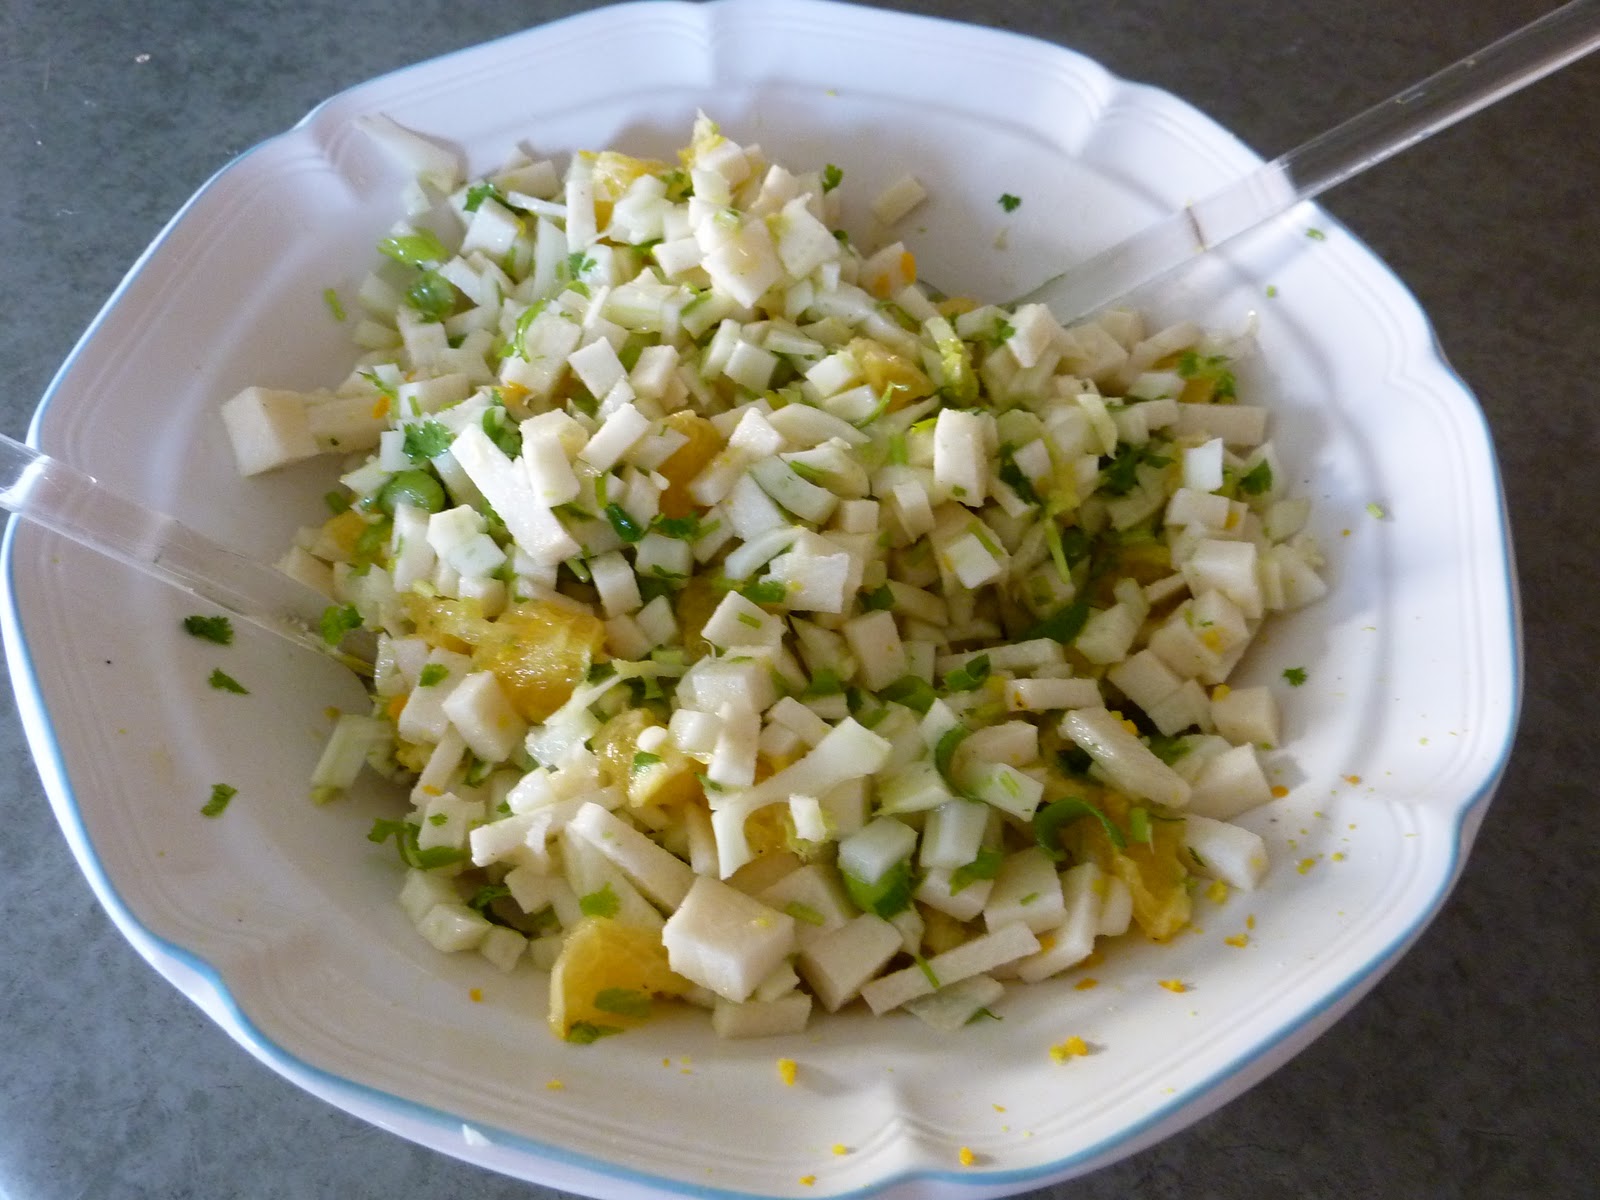
Some of the chopped vegetables that I used in the salad.
I chop the pickled ginger as the pieces are too long otherwise.  If I want the salad to be more tangy, I will also add rice vinegar. 
Nori is sold in packages of 10 or more sheets.
I cut the nori into strips and then bake the nori and sesame seeds in the oven for about 5 to 7 minutes at 325 degrees F.  The small pan I am using is over 30 years old.
I sprinkle the nori and sesame seeds on top of the individual serving bowls.

INGREDIENTS:

1 ½ cups of sushi rice or other short grain rice
1 ¾ cups of water
¼ cup seasoned rice vinegar
1 tbsp sesame oil
2 carrots, finely chopped
½ red or orange pepper, chopped
2 green onions, chopped
½ cup edamame beans
2 tbsp fresh dill or 1 tbsp dried dill
small bunch of fresh cilantro, chopped
2 tbsp pickled ginger, chopped
2 sheets of nori, preferably toasted, broken up
2 tbsp sesame seeds, toasted

DIRECTIONS:

Rinse the rice under cold running water or let it sit in a pot of cold water for 20 minutes and then drain.   Place the rice in the saucepan with the water, cover and bring to a boil.  Reduce heat and cook for about 12 to 15 minutes.  Let the rice cool for about 15 minutes and turn it over every so often to help it cool off.  Add the vinegar and sesame oil and toss gently until it is absorb.  Since the rice is sticky, I use a wooden spoon and try to toss the rice by cutting into it with a wooden spoon.   I sometimes add more than ¼ cup of vinegar if the rice is really sticky and it is difficult to mix.  

Once the rice has cooled down, add all of the remaining ingredients except the nori and sesame seeds and toss well.   If you find that the salad is not tangy enough, add more vinegar, either seasoned or just rice vinegar.  Before serving, sprinkle the nori and the sesame seeds to the individual bowls.


Friday, August 20, 2010

VEGETARIAN PIZZA

Making your own pizza from scratch is not quite as easy as buying a ready made frozen pizza or ordering one from your favorite restaurant.  But making a pizza at home is worth the effort as it tastes wonderful!  I made a vegetarian pizza using a recipe for the crust that my sister-in-law provided when she made spinach feta pizza.  For the vegetables, I used a variety of vegetables that I had in the fridge.  For the cheese topping, I used goat cheese and mozzarella.  Instead of using tomato sauce to cover the pizza dough, I used pesto sauce.  Because the cooking time for a pizza is not long and I am not using a commercial pizza oven, I softened the vegetables by first microwaving all of them except the olives, green onions and tomatoes for about 90 seconds.


The dough has been made and is ready to be covered in order to let it rise.
The dough has doubled in size and is ready to be rolled out with a rolling pin.

I rolled the dough out right to the edge of the pizza clay baker.
Following covering of the dough with pesto sauce, I started to add the vegetables.  
Everything is on the pizza except for the grated mozzarella which is the last ingredient to be added.
Hot out of the oven and waiting to be sliced.  The crust looks dark because I used whole wheat flour. 
Dough:
¾ cup warm water
½ tsp salt
½ tsp sugar
1 tbsp instant yeast
¼ cup cornmeal
2 cups flour, approximately.

Mix the first 5 ingredients.  Gradually add the flour to form a soft dough, knead a few times and then cover with a sheet of plastic followed by a dish towel.  Let rise to double.  This could take up to two hours.  Roll out to fit a large pizza pan or a clay pizza baker.  You don’t need to let it rise a second time and you can start to add the toppings.
  
Toppings:
pesto sauce
1 small zucchini, sliced
1 yellow pepper, sliced into strips
5 mushrooms, sliced
2 green onions, chopped
¼ cup back olives, sliced
8 spears asparagus
2 tomatoes sliced
goat cheese, cut into small pieces
mozzarella cheese, grated

Directions:
Add the toppings to the pizza dough by first spreading the pesto sauce over the complete surface of the dough.  Add the other vegetables.  The last ingredients to be added are the cheeses.

Bake at 425°F for about 20 minutes.

Tuesday, August 17, 2010

RICE BOWL WITH BEEF

I made a roast beef for supper on Sunday and after two consecutive days of having roast for supper, it was time for a change.  Some people can eat leftovers for days on end while others can only handle one to two days of leftovers.  I fall somewhere in between and it depends on what the leftovers are.  One meal I do make with leftover meat is a rice bowl.  A rice bowl is essentially rice placed on the bottom of a big soup bowl or a pasta bowl and topped with stir fry vegetables and meat.  It can be as simple or as complicated as you want to make it.  I try to go for the simple method.  The following pictures provide the ingredients and commentary.

In a large bowl, mix 2 tsp of brown sugar, 1 tbsp soy sauce or tamari sauce, 1 tsp sesame oil, 1/2 tsp grated fresh ginger and 1 minced clove of garlic.  This is a marinade sauce and is good for other cuts of cooked and raw meat.  

Slice the leftover meat into thin strips.  As this had to serve 2 people and I had about 5 to 6 ounces of cooked roast, the focus would be on the vegetables and not the meat.  Mix the meat into the marinade and put into the fridge while you prepare the vegetables.  

Chop an onion, carrot, 1/2 red pepper, one broccoli bunch and a handful of mushrooms. Heat 1 tbsp of oil in a wok and once the oil gets hot, add the onion.  Saute on medium high heat for a few minutes and then add the rest of the vegetables. 

Since there was not going to be a lot of meat in this dish, I decided to add 1/2 cup of edamame beans to the wok.  I buy shelled frozen edamame beans and use them in a variety of recipes. 

Before I started to marinate the meat, I got the rice going.  I have a small rice cooker and use it when I don't need to make heaping quantities of rice.  I cook both basmati white and brown rice and will cook either one depending on time that I have to cook the rice. 

Saute the vegetables for about 5 minutes and then add the meat.  Cook for another few minutes.

Supper is ready!

Sunday, August 15, 2010

ZUCCHINI BREAD/LOAF

I have been making this zucchini bread recipe for many years.  I am not sure where I got it.  It is transcribed onto a recipe card and I keep it in a recipe box along with other treasured recipes that I have collected over the years. There are a number of variations you can do with this recipe. You can use only whole wheat flour for the 3 cups of flour required, use only white flour or do half and half as indicated in the recipe.  I used all whole wheat flour when I made it this time. The recipe calls for 1 1/4 cups of milk and I have altered this and included plain or vanilla flavoured yogurt as part of the 1 1/4 cup requirements.  I will also add more shredded zucchini than what the recipe calls for depending on the size of the zucchini I am shredding.  You can add chopped nuts or cranberries along with the raisins.  I sometimes find if the batter seems too stiff once all of the ingredients have been added, I will add a bit of milk.

Shredded zucchini added to the batter.

A cup of raisins added to the batter.

I poured the batter into a 9" by 12" baking pan. 
Close-up look at a wedge of the zucchini bread.


WHOLE WHEAT ZUCCHINI BREAD

INGREDIENTS:

1 ½ cups flour
1 ½ cups whole wheat flour
¾ cup brown sugar
4 tsp baking powder
1 tsp salt
1 tsp cinnamon
1 egg
1 ¼ cups milk
¼ cup oil
1 ¼ cups zucchini, shredded
1 cup raisins

DIRECTIONS:

In a large bowl, mix the flour, brown sugar, baking powder, salt and cinnamon.  In a separate small bowl, beat the egg and then add the milk and oil.  Mix well.  Add the egg mixture to the flour mixture.  Mix the batter and then add the zucchini and raisins.  Mix well and pour into a large loaf pan or a medium sized square pan.  Bake at 350 degrees F for about 60 to 70 minutes.   

EPILOGUE - DOG STATUE

In a May 24, 2010 posting I wrote about partnerships between my dog and cat, I talked about a statue that got in the way between the dog and a tennis ball (link to story).  The statue hit the floor and the result looked like this:

I tried to fix the statue using various glues but was not successful.  The break was close to the base and the dog was in a lunging pose so there was a lot of forward motion.  It likely needed some sort of bracing to stay up.  I took it back to the store where I had purchased the statue.  This statue is actually part of a larger piece.  Attached to this statue by way of a metal leash is a woman hanging on for dear life.  My DH purchased this caricature piece for me as I am sure I have experienced this at times walking the dog.  The owner of the store where the DH had purchased this piece loves challenges.  Her name is Verna and she owns Alfords.  She assured me that she could fix the statue and she also has a soft spot for animals.  Verna was able to reattach the dog to the base of the statue.  The following picture shows the result.

This next photo puts the dog together with the woman hanging on to the leash with her heels digging into the ground and hanging on.  If statues could only talk.

Friday, August 13, 2010

CHERRY CRISP

I like making fruit crisps as they can be an easy and quick dessert to make.  I made this crisp using the cherries that I picked from our cherry trees.  I also used the cherries from the backyard trees to make jam, jelly and a pie.  This was profiled in an earlier blog (link here).  

The following recipe is good with any berries, apples, peaches, nectarines, plums or your other favorite fruit.  I made this recipe using spelt flour as one of the dinner guests that I served this to is on a gluten free diet.  As I was making this crisp for company, I doubled the recipe and used a deep pan.

INGREDIENTS:
4 cups of pitted cherries or other fruit
2 tsp almond flavouring if using cherries or lemon juice
2 tsp tapioca
1/2 cup white sugar (only if using sour cherries)
1/2 cup quick cooking oatmeal
1/2 cup flour
1/2 cup butter, melted
1/2 cup brown sugar  

DIRECTIONS:
In a medium size bowl, mix the cherries, almond flavouring, tapioca and white sugar.  Pour this mixture into a 9 inch pan.  Rinse the bowl and mix the flour, oatmeal, butter and brown sugar.  Spread this crumbly mixture over the the cherries.  Bake at 375 degrees F for about 30 to 35 minutes.  The crisp should be brown and the fruit will be bubbling.  Serve warm or cold by itself or with ice cream.  Makes about 6 servings.

Wednesday, August 11, 2010

ZUCCHINI

This year has not been a bumper crop for zucchini in our garden.  We have had too much rain.  The leaves on the zucchini plants appear to have mildew and who knows what else.  I usually have lots of zucchinis and there is only some much shredding, bagging and freezing I will do with zucchini.  I use frozen shredded zucchini to make muffins, breads, chocolate cake and soups.  I also look for volunteers who will take zucchini for their own use.  It is sometimes a joke when you have company come over, they will aways leave with a zucchini. 

There are numerous zucchini dishes one can make - from breads to muffins to chocolate cake to omelets to vegetable dishes.  I like making a side dish with zucchini that can be eaten on its own or with rice or pasta.  The recipe can vary depending on what you have in the fridge.  This recipe is very simple to make.  In a large frying pan, on medium heat, add some olive oil, let the oil get hot and then add a chopped onion and a minced garlic clove.  Saute for about four minutes and then add about 5 mushrooms sliced, one chopped zucchini, half a chopped pepper and one chopped celery on medium low heat.  Saute for about 5 minutes and then add one chopped tomato.  Cook for another five minutes and add salt and pepper to taste.  You can also add dry or fresh basil or fresh or dried oregano.   

Monday, August 9, 2010

MINIMALISTIC LIVING AND EATING

I read an interesting article in the August 8, 2010 edition of the New York Times about consumption (food and goods) and whether our increased consumption will make us any happier.
http://www.nytimes.com/2010/08/08/business/08consume.html?pagewanted=1&ref=general&src=me
The article explored the activity of people who have made changes in their lives including jobs, where they live, the size of their home/apartment and the amount of possessions they own.  These individuals have become more minimalistic and are much happier.  The article covered some research that showed how we spend our money, the frequency and what we choose to spend it on and its emotional efficiency.  Or in other words, how we reap the most happiness for our dollar.  They also looked at different categories of consumption and its correlation to happiness. The category most correlated to happiness was leisure - from trips to entertainment to sports.   Companies who want us to buy their products actively monitor this research.

One of the interesting stories in this article was about a couple who downsized and are now living in a 400 square foot studio apartment in Portland Oregon.  Tammy Strobel, profiled in this article, has created a blog site called rowdy kittens and it is about living simply http://Rowdykittens.com/  One of her recent postings had a link to a story about a friend of hers who was recently featured on PBS.  Tammy's friend Dee is involved in the tiny house movement and lives in a really tiny house.  Her house is about the size of my kitchen.  There is a link on this posting to the PBS story and it is about eight or so minutes in length.  It is worth watching as other small houses are featured.   I admire these people but I couldn't make their lifestyle choices in terms of how big their home is.  I have to admit, I like lots of living space.  The more the better and I know this issue likely has deep roots into my childhood.  I don't like cluttered space either but if you were to live in a tiny house or apartment, you would have to live with minimal possessions.  It is all about how much we need versus want, how much we collect and our over consumption of clothes, toys and other material goods.  This is a good discussion to have with family and friends.

Tammy's site has information on minimalistic cooking and she is a fan of Michael Pollan (whom I admire and have written about in previous postings) and a blog site called the stonesoup  http://thestonesoup.com/blog/  This blog site is about minimalistic home cooking and is very good.  The blogger's name is Jules Clancy and she is based out of Sydney Australia.  I need to spend more time on her site as there is lots of information and recipes.  She has created her own cookbook and the recipes are each based on a maximum of five ingredients and take ten minutes to prepare.  She believes in preparing simple, quality and wholesome food.  You can download her cookbook in a pdf format.

Sunday, August 8, 2010

JICAMA, FENNEL AND CITRUS SALAD

Jicama is a sweet and crispy root vegetable that looks like a turnip.  You need to peel it before eating it.  It can be added to salads, raw vegetable platters or salsas. It has been grown in South America for centuries and is a legume that grows on vines.

The first time I tried jicama was a number of years ago while vacationing in Arizona.  The people I was visiting used jicama in their raw vegetable platters.  It was cut up in thin strips along with other vegetables.  Several weeks ago I had a jicama, fennel and citrus salad at a local restaurant called Tangerine and I thought the flavour combination was wonderful.  I didn't get the recipe from the restaurant but noted the main ingredients and googled several recipes to figure out a dressing.  The restaurant used pine nuts in their recipe but I left it out.  This salad tastes just as good the following day after making it.


INGREDIENTS:
1 jicama, peeled and cut into thin strips
1 fennel bulb, cut into thin strips
1 orange, chopped into small pieces or 1 small can of mandarin oranges
2 green onions, chopped
2 tbsp chopped fresh coriander or parsley
grated orange peel from ½ an orange

DRESSING:
3 tbsp olive oil
2 tbsp lemon juice
1 tbsp red wine vinegar
1 tbsp honey or agava
1 clove of garlic, minced
salt and pepper to taste

DIRECTIONS:
In a medium bowl, combine jicama, fennel, oranges, onions, peel and coriander. Set aside.  In a small bowl or jar, whisk together olive oil, lemon juice, red wine vinegar, honey, and garlic.  Add salt and pepper to taste.  Pour liquid over jicama and fennel mixture. Toss to coat.  Serves 6 people.

Friday, August 6, 2010

RYE BREAD

Rye bread with caraway seeds is one of my favorite breads.  Spreading cream cheese and adding smoked salmon and capers to a slice of rye bread is heavenly.  Toasted rye bread spread with peanut butter and jam also tastes really good.

I made this recipe using rye flour and whole wheat flour.  I use dough enhancer as it quickens the rising process but it is not imperative for you to use.

After mixing the bread with a dough hook, the dough was divided to fit
into three large and one small bread pan.  After covering it with a sheet of plastic and a tea towel, I peeked after letting it rise for two hours. 

Four baked loaves lined up and cooling off.


I love the outside crust and here is the first slice.


INGREDIENTS:


4 cups of rye flour
6 - 7 cups of flour; unbleached or whole wheat
2 tbsp dough enhancer
1 tbsp salt
2 tbsp yeast
4 cups of water, room temperature
1/4 cup oil
1/4 cup brown sugar or honey
2 tbsp lemon juice
2 tbsp caraway seeds
1 heaping tsp allspice

DIRECTIONS:


In a food processor with a bread paddle attachment, combine all of the ingredients and knead at low speed for 8 minutes.  Add more flour if required to get the right consistency.  Divide the bread mixture into three large loaves or four medium loaves, shape into loaves on flour coated counter and place into pans.  Cover with a sheet of plastic followed by a tea towel and let rise until the dough has risen to the top of the loaf pans.  This could take about two to two and a half hours.  Bake at 350 degrees F for 50 to 60 minutes.

Tuesday, August 3, 2010

DOG DAYS

I have wondered at times about the meaning 'dog days' or 'dog days of summer'.  I looked up some definitions and found two sources:


Merriam-Webster’s dictionary describes dog days as (1) the period between early July and early September when the hot sultry weather of summer usually occurs in the northern hemisphere;(2) a period of stagnation or inactivity.

Encyclopaedia Britannica describes dog days as periods of exceptionally hot and humid weather that often occur in July, August, and early September in the northern temperate latitudes. The name originated with the ancient Greeks, Romans, and Egyptians; they believed that Sirius, the dog star, which rises simultaneously with the Sun during this time of the year, added its heat to the Sun’s and thereby caused the hot weather. Their belief that dogs were subject to spells of madness at this time also may have contributed to the name.

Where I live, I wouldn't say that we have experienced exceptionally hot and humid weather this summer.   After reading these definitions I realized that it does not have anything to do with dogs lazing around. This got me thinking about the favorite spots that my dog likes to laze around.  He has several around the house and I thought it would be entertaining to illustrate them.

Having several soft comfy beds around the house allows for taking naps in several strategic locations

This covered sofa chair is by the kitchen and provides him with a soft place to curl up and supervise the activities going on in the kitchen.  He has to keep tabs on the food preparation.
 
He likes to prop his head on the chair by the telephone table. This is also in a strategic location by the kitchen.

Laying by the front door allows him to stretch out and also keep tabs on everyone in the house.

This last photo is his night resting spot.  The bed looks like a small couch and he loves sleeping on his dog bed. 

Watching the dog, I realize we could take lessons at times from our canine companions in learning how to relax and laze around.