Showing posts with label Desserts. Show all posts

Sunday, February 16, 2020

PEANUT BUTTER BANANA CHOCOLATE CHIP LAYER CAKE


I have always admired cake bakers and cake decorators. Their artistic creations and imagination to make pretty or stylized cakes can be a work of art.

I have never made a double or triple layered cake. I have shied away from it and kept to muffins, regular cakes, loaves, cookies and bread. I am a regular reader of the blog from Ambitious Kitchen and seeing this peanut butter banana chocolate chip three layer iced cake (Ambitious Kitchen) intrigued me. It was time to venture into trying something new.

Because I love kitchen gadgets, tools and baking bans, I invested in a few things as I didn't have some of the required cake making tools in my arsenal. For valentine's day, the DH bought me a cake decorating turntable and some decorating tools and I bought three - six inch cake pans (3 inch deep) along with some icing knives. I realize if I want to make some different cakes, I will need some eight inch cake pans.

There are numerous recipes for peanut butter banana layer cake. This recipe from Ambitious Kitchen interested me because I have already made many recipes from her blog site; the ingredients include almond and coconut flours; it doesn't have an excess amount of sugar; and, I understood her baking instructions. I did do some additional research on how to bake a layer cake, how to prep baking pans and decorating a cake. Baking and decorating cakes is a new world for me and I might try to make some novel cakes in the future.

The frosting requires powdered sugar. I made my own powdered sugar from coconut sugar. It is easy to do and involves blending in a high speed mixer the sugar required for frosting until it has a powdered texture. To make it more powdered, you can add one tablespoon of arrowroot or tapioca flour for every one cup of coconut sugar added to the blender. If you are not making it paleo, you can also use corn starch.

There are lots of ways you can decorate a cake with chocolate chips. I tried to be simplistic and not over do the number of chips pressed into the icing. I did measure the height of the cake with the icing and it is five inches. You can make the cake using two - eight inch cake pans and the height of the finished cake would be less.

I baked the cake batter the day before I was going to serve the cake. I lined the bottom of each cake pan with a round of parchment paper and used a cooking oil spray under and over the parchment paper and also sprayed the sides of the pans. I lightly floured the sides of the pans after applying the cooking spray. I let the cakes cool in the pans and they were very easy to remove from the pans. I continued to cool them on baking racks. Once the cakes were thoroughly cooled, I wrapped each one in plastic wrap and stored them in the fridge. The following afternoon I made the peanut butter icing.

Everyone who sampled the cake gave it a thumbs up.


Monday, September 2, 2019

PALEO PLUM CRISP


Plum crisp just out of the oven and cooling.
Having bought a large tub of regular size red burgundy plums at Costco (about 12 to 14 in the tub) I realized that they were going to get soft quickly. Most were stored in the fridge and after eating the four juicy plums left in the fruit basket on the counter, I was thinking that the ones stored in the fridge would likely be soft. After eating about a quarter of a plum from the fridge, my assumptions were correct. The options to consume the eight and 3/4 remaining plums were to either bake with them, stew them or freeze them (a good fall back option). I decided to bake them and make a crisp. The oven was already on as I was roasting a chicken. I baked the crisp in two dishes, a small white ramekin and a glass dish. I used chopped walnuts in the topping. I also did not peel the plums. After cutting the plums up, there was so much juice I had to drain off some of the juice.

The crisp recipe I used was my standard one used to make cherry, rhubarb or apple crisp. A crisp is a crisp and the topping can be used with any kind of fruit. I like to enjoy crisp not only as a dessert but also for breakfast. I add the crisp like a topping to a small bowl of plain greek yogurt instead of adding granola. 

Plums mixed with ingredients in the bowl.
Fruit placed in a small ramekin, topping added and then baked.
The second dish was made in a larger baking dish. Fruit placed in a glass baking dish, followed by the crisp. Crisp was then baked.

INGREDIENTS:

Fruit:

8 medium to large size plums, pitted and sliced into chunks
1 tbsp lemon juice
2 tbsp sugar or stevia
2 tbsp arrowroot powder or minute tapioca

Topping:
1/2 cup slivered almonds or chopped pecans or chopped walnuts
3/4 cup almond flour
2 tbsp coconut flour
1/4 cup honey or maple syrup
1 tsp cinnamon
1/4 cup coconut oil (at room temperature) or butter

DIRECTIONS:

Heat the oven to 350 degrees F. In a large bowl, add the fruit, lemon juice, sugar and arrowroot powder and mix well. In a separate bowl, mix together all of the topping except the coconut oil or butter. Add the oil or butter and mix using a fork or pastry blender so that it forms into crumbs or clumps. Using honey will make it more like clumps.

Grease with oil or butter a medium size baking pan. Add the fruit mixture, spread it evenly across the pan and add the topping to cover the fruit. Bake for at least 30 minutes or until it is bubbling and the topping has browned. Serves 6 to 8 depending on appetites.  

Sunday, July 15, 2018

PALEO UPSIDE DOWN RHUBARB CAKE

With two healthy rhubarb plants in the garden, I decided to make a big dent in the stalks that were ready to be eaten and pulled out many stalks this morning. I pulled out enough that I had 11 cups of chopped rhubarb. I froze four bags each with two cups of chopped rhubarb and used the last three cups to make a cake. 

Three years ago I posted a recipe for upside down rhubarb cake. It is still a great recipe and I decided to update it to make it paleo. This is a favourite recipe of the DH (he has many favourites) and he asked if I would make it again. The change that I made was to make a paleo cake batter. I used a coffee cake recipe with a few small modifications from paleorunningmomma.com and the same rhubarb topping and directions from my original posted recipe. In the original post I also made subsequent upside down cakes and used other fruit besides rhubarb. 


In a number of coffee cake recipes, cinnamon is used and I decided to add cinnamon but in less quantity. I also wanted to use a white based sugar versus maple syrup or sugar or coconut sugar that many paleo cakes use as I didn't want the batter to be too dark. I used stevia to sweeten the batter and the rhubarb topping. 


Cake pan greased with butter and then sugar added.
Rhubarb topping placed over the sugar lined cake pan and then added the batter.

Out of the oven and cooling.


Inverted into a large glass quiche plate 


Ready to sample.

INGREDIENTS:


Topping:

3 cups rhubarb, chopped
1/4 cup strawberry or raspberry jam
1/4 cup sugar 
1 tbsp soft butter 

Batter:

2 cups ground almond flour
1/4 cup arrowroot flour
1/2 tsp baking soda
1 tsp cinnamon 
1/4 tsp salt

3 eggs, room temperature

1/4 cup coconut or almond milk
1 tbsp lemon juice
3 tbsp coconut oil, melted and room temperature 
2/3 cup sugar, eg stevia or coconut, or maple sugar
1 tsp vanilla extract


DIRECTIONS:


Slice the rhubarb into small pieces. Place in a medium-size bowl.

Preheat oven to 350 degrees F. Generously coat the bottom and side of a 9-inch round cake pan or a 10-inch deep-dish pie plate with 1 tbsp butter. 

Place jam in a small bowl and microwave for 25 to 30 seconds, until melted. Pour the jam over the rhubarb and stir to evenly coat. Evenly sprinkle 1/4 cup sugar over the bottom of the cake pan or pie plate. Spoon rhubarb mixture over the sugar and evenly spread it out.

In a medium bowl, combine the almond flour, arrowroot flour, baking soda, cinnamon and salt. Set aside.

In a large bowl, whisk the eggs and then add the milk, lemon juice, coconut oil, sugar and vanilla extract. Using a whisk or a mixing spoon combine well. Add the dry ingredients to the wet ingredients and mix well using a spatula or mixing spoon.

Spoon the batter over the rhubarb mixture in the cake pan and evenly spread the batter around. The batter will be thick. Bake in the oven for 28 to 30 minutes and cook until a toothpick inserted into the centre of the cake comes out dry. If the cake batter is browning too quickly, cover loosely with foil for the last five or so minutes. 

Cool the cake in the pan on a rack. Run a knife around edge of cake. Invert onto a large cake plate. It is best to wait until the cake cools down before you flip it onto a plate as you want the fruit topping to solidify. Serves 8 to 10 depending on serving sizes.

Cake batter adapted from paleorunningmomma.com

Monday, June 25, 2018

RHUBARB STRAWBERRY PALEO CRISP


Two healthy rhubarb plants are thriving in the garden. I picked quite a bit the other day and froze a bag with four cups of chopped rhubarb, gave some to a friend and used another four cups to make a crisp. I like rhubarb mixed with strawberries. As it is hot outside and not wanting to heat up the kitchen, I cooked the rhubarb on the bbq. I use the top rack above the burners so that the bottom doesn't burn before the crisp is cooked. If you don't have a top rack or what some call a warming rack, you can cook the crisp on the main grill with a few burners turned on and the crisp off to the side without the burner turned on right under the pan with the crisp. Last year I made several pies on the top rack and they turned out well. If the topping is browning too fast on the bbq, cover the pan with tin foil while the fruit cooks. I covered it after about 20 minutes of cooking.

I used honey in the topping and as it was more clumpy versus crumbly, I used my fingers to drop small clumps onto the fruit mixture. The crisp cooked for 50 minutes on the bbq and I had the temperature at about 400 degrees F. 

The consistency of the topping using honey.


Adding the topping to the fruit.

Ready for the bbq.

Cooking on the top rack.
Ready for sampling.


INGREDIENTS:

Fruit:

4 cups chopped rhubarb
2 cups sliced strawberries (fresh or frozen)
1 tbsp lemon juice
3/4 cup sugar or stevia (stevia for baking)
2 tbsp arrowroot powder or minute tapioca

Topping:
1/2 cup slivered almonds or chopped pecans
3/4 cup almond flour
2 tbsp coconut flour
1/4 cup honey or maple syrup
1 tsp cinnamon
1/4 cup coconut oil (at room temperature) or butter

DIRECTIONS:

Heat the oven to 350 degrees F. In a large bowl, add the fruit, lemon juice, sugar and arrowroot powder and mix well. In a separate bowl, mix together all of the topping except the coconut oil or butter. Add the oil or butter and mix using a fork or pastry blender so that it forms into crumbs or clumps. Using honey will make it form more like clumps. 

Grease with oil or butter a medium size baking pan. Add the fruit mixture, spread it evenly across the pan and add the topping to cover the fruit. Bake for at least 30 minutes or until it is bubbling and the topping has browned. Serves 6 to 8.  

Saturday, May 5, 2018

CHERRY CRISP WITH A NUT DATE TOPPING

In looking to make a dessert that is somewhat paleo and to use some of the frozen sour cherries from last summer, I decided to make cherry crisp with a different topping than what I have tried before. I combined recipes from previous posts and a topping from paleorunningmomma. The topping is different as it uses mainly dates and walnuts with a small amount of almond flour. The dates provide a nice sweetness to the topping.

For sugar in the filling, I used erythritol which is a natural sweetener and has a low glycemic index. I used tapioca starch in the filling as the cherries were frozen and I know they would have a lot of juice once thawed. After baking it, I should have added more tapioca starch than two and a half tablespoons. I would have preferred it to have less juice once baked. I had both pecans and walnuts in the pantry and decided to use walnuts. 

This recipe is a nice change from an almond flour based topping. 

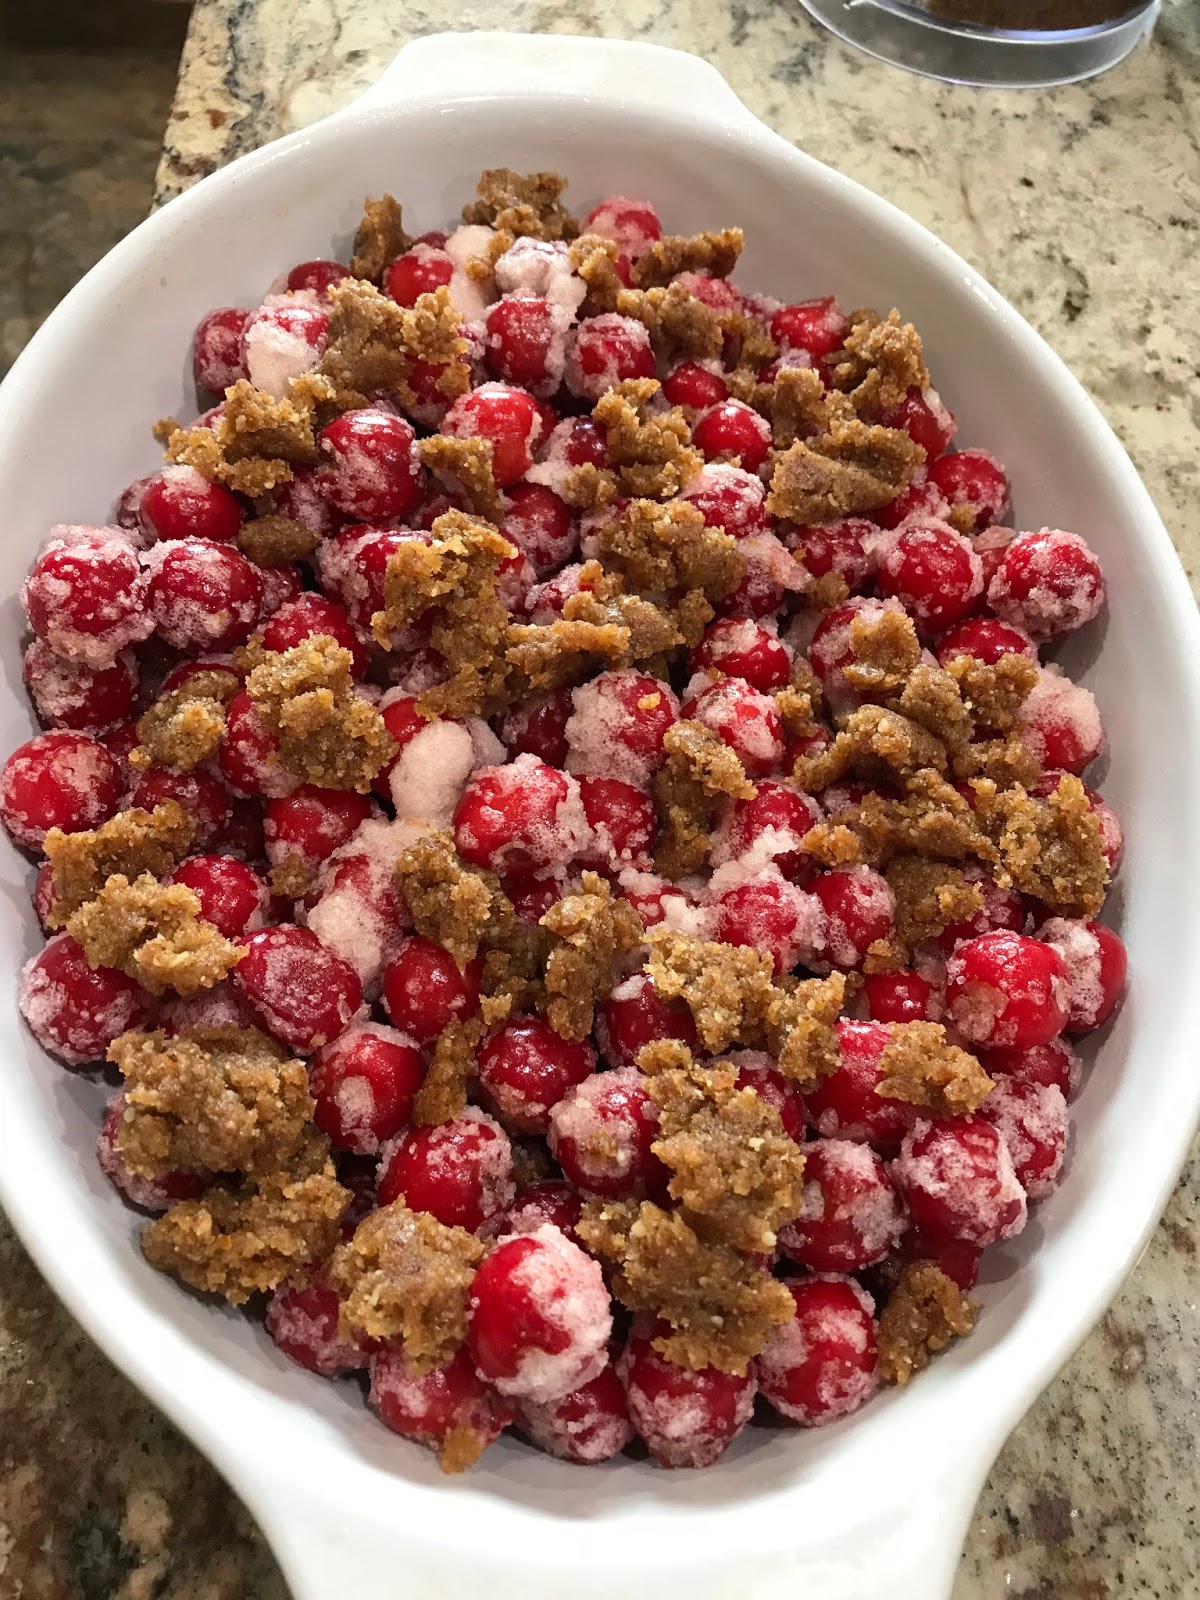
Starting to add the topping.

Crisp covered with topping and ready to bake.

Cooling off after baking.

DIRECTIONS:

Filling:

4 cups of fresh or frozen pitted cherries
¼ cup white sugar or splenda
¼ cup brown sugar
2 tsp almond extract
1/8 tsp salt
2 ½ tbsp ground almond flour or tapioca starch

Topping:

1 cup pitted dates softened*
1 cup raw walnuts or pecans
1/3 cup almond flour
1/2 tsp pure vanilla extract

DIRECTIONS:

  1. Preheat your oven to 350 degrees F.
  2. To make the topping, combine the softened dates, walnuts, almond flour and vanilla in a food processor and process on high until a crumbly paste forms.
  3. Place the cherries in a large bowl and add the sugar, almond extract, salt and almond flour or tapioca starch. Combine well.
  4. Grease a 1.5 quart baking dish and add the filling mixture. 
  5. Generously sprinkle the crumb topping over the berries using the entire mixture.
  6. Cover the top with aluminum foil and bake in the preheated oven for 20 to 25 minutes, remove the aluminum foil and continue to bake another 15 to 20 minutes until the fruit is hot and bubbly and the top begins to brown and turn crispy. If using frozen cherries, you will have to gauge the time as it might need more time to bake. I baked it for about 50 minutes.
  7. Remove from oven, allow to cool and serve warm. Store leftovers covered in the refrigerator. 
  8. Serves 6 to 8 depending on appetites. 

Recipe Notes
*To soften the dates, soak them in a small amount of hot water for one to two minutes, then drain.


Recipe is a combination of ones already posted on this blog and paleorunningmomma for the topping.

Wednesday, December 13, 2017

PECAN DATE BITES

I was never a big fan of pecan or raisin pie as I always found them to be too sweet. The Real Food Dietitians recently shared a small recipe book for holiday season baking. I saw this recipe in their book. They call them truffles but I like to call them bites as I make them small, bite size. When I think of truffles I conjure up smooth tasting ganache chocolate. What I like about this recipe is that is like pecan pie without the added sugar and pie crust. The sugar is provided by the dates. It is not overly sweet and the calories do no make me cringe. 

I made a few minor changes to the recipe. I added a cap of melted chocolate onto the top of each bite. I didn't add the extra sea salt or pecan to the top of the bite. You can drizzle the chocolate if you like. I used a mini cookie scoop and made 20 bites. I like to store them in the fridge if I am going to be eating them over several days. Otherwise I would store them in the freezer. 

The DH and I both like these bites and I think they will be popular with guests.


Used a small cookie scoop to place the Bites on  a cookie sheet.

Added a small cap of melted chocolate to the top of the Bite.
Ready to sample!


INGREDIENTS:


• 1 1⁄2 cup raw pecans
• 18
Deglet Noor dates or 9 meejool dates, pitted

1 tsp pure vanilla
• 1/8  tsp sea salt


2 tbsp dark or semi-sweet chocolate chips 
• 1⁄4 tsp coconut oil
• Optional - 
extra sea salt and/or chopped pecans for sprinkling on top


DIRECTIONS:
page10image3674800
  1. Place pecans, dates, vanilla and sea salt in the bowl of a food processor. Process until mixture resembles coarse sand and sticks together when pinched between two fingers. If mixture is too dry, add a few drop of water and process again. If mixture is too sticky, add a few more pecans and process again.
  2. Roll nut mixture into 16 balls (about 1 tablespoon of mixture each). Place on a plate or a cookie sheet lined with parchment paper.
  3. Melt chocolate chips and coconut oil in a small bowl in the microwave (or set over a pan over simmering water to simulate a double boiler) - 5-10 seconds at a time, stirring in between, until glossy and smooth.
  4. Use a spoon to drizzle each bite with melted chocolate. Sprinkle with additional sea salt and chopped pecans, if desired.
Allow chocolate to harden before storing in a covered container on the counter for up to 3 days. They may also be refrigerated or frozen for longer storage. 

Makes 16 to 20 servings depending on the size of the bite. 

From the Real Food Dietitians

Sunday, October 29, 2017

APPLE CRISP PALEO STYLE

Having a number of apples in the fridge and a friend coming for supper, prompted me to bake a dessert. It was a good excuse to try making apple crisp paleo style. I looked at several cookbooks I had and adapted this recipe from one I saw in Everyday Paleo for a berry crisp. Why I made this paleo style is because this household is watching its carbs and sugar intake. I like using almond meal or almond flour in cooking and baking. What I like about this recipe is that it dresses up baked apples.

Apples in the non-stick pan.

Almond meal, coconut flour and cinnamon combined.

The egg has been added and the topping is ready to spread over the apples.

Going into the oven.

INGREDIENTS:

6 apples, cored and chopped
1 1/2 cups almond meal
2 generous tbsp coconut oil (solid at room temperature)
1 tbsp cinnamon
drizzle of honey or maple syrup or Splenda (optional)

DIRECTIONS:

Heat the oven to 350 degrees F. Put the chopped apples into a non stick plan and spread evenly across the pan. I used a 8 X 11 inch rectangle plan. Drizzle the honey or maple syrup or sprinkle the Splenda over the apples.  

In a small bowl combine the almond meal and coconut oil. I used a small pastry blender to mix two together. Add the cinnamon. Combine using a fork or mixing spoon. Add the egg and mix thoroughly. The mixture will be crumbly and a bit doughy. 

Using your fingers or a fork, drop small pieces of batter on top of the apples so that they are evenly covered. Bake for 35 to 40 minutes or until the crust is golden and the apples look baked.  Serves 6. 

Sunday, October 1, 2017

APPLE SCONES WITH OAT FLOUR

I recently bought a bag of oat flour and since it wasn't too hot outside, I was thinking about baking something that could be consumed either for breakfast or as a treat. I also had gone out for lunch with friends and knew that I was not interested in a full supper as I had a big bowl of pho chicken soup for lunch. 

After looking at some cookbooks and the internet, I decided to make scones. I like scones but not too overly sweet. I used an apple as the fruit in these scones but you could also use pear, banana or berries. The recipe calls for cane or coconut sugar but you can use regular sugar. I used cane sugar. The coconut oil was already soft in the large jar and I didn't need to cut it into the flour with a pastry cutter. I used a hard mixing spoon. Using soft coconut oil made the flour mixture less crumbly, too sticky and more of a blended mixture. I think because of this, I added a bit more oat flour to the dough when I was separating the dough into two halves and shaping it into two round circles. I left the two rounds of dough with each scored into six pieces. I didn't separate the pieces to bake. 

The scones turned out fine, a bit crumbly as I used gluten free certified oat flour and rolled oats which is not the same as baking with flour. They are light and not too sweet. I like the combination of apple and cardamon.


Before baking - two circles of dough scored into 6 pieces per round.

 
Ready for sampling!
INGREDIENTS:

1 cup oat flour
1 cup old-fashioned or quick-cooking oats
cup natural cane sugar or coconut sugar
2-1/4 tsp baking powder
1 tsp ground cardamom
¼ tsp fine sea salt
cup solid coconut oil, cut into chunks
1 large egg
2 tbsp milk (dairy or nondairy)
1-1/4 cups chopped apple, option to peel it

INSTRUCTIONS:

1. Preheat oven to 400°F. Line a large baking sheet with parchment paper.

2. In a large bowl, whisk together oat flour, oats, sugar, baking powder, cardamom and salt. Using a pastry blender or two knives, cut in coconut oil until crumbly.

3. In a small bowl, whisk the egg and milk. Add to the flour mixture and stir until just blended; fold in apples.

4. Turn dough out onto a surface lightly dusted with oat flour. Gently pat into two 6-inch circles, about ½ inch thick. Cut each circle into 6 wedges and place 2 inches apart on prepared baking sheet.

5. Bake in preheated oven for 17 to 22 minutes or until golden brown and firm to the touch. Transfer scones to a wire rack and let cool for 5 minutes. Serve warm or let cool completely.


Adapted from powerhungry.com

Sunday, July 30, 2017

BLUEBERRY CRISP ON THE BBQ

As it is the season for berries, it is hard to resist buying more berries than you can consume. Furthermore, some of the berries that you may have bought are getting soft. A large clamshell of blueberries that we had bought were getting soft. The options were to either freeze the berries or use them in baking. Since it has been so warm outside, turning on the oven did not seem to be a good idea. I decided to bake the crisp on the barbecue. Having already baked a cherry crisp and pies on the barbecue this summer, I decided to bake a crisp using a round speckled blue roasting pan that normally is used to cook a small roast or chicken. I won't use glass or ceramic baking dishes on the barbecue. I prefer to use metal. Using a barbecue for cooking is very handy when you don't want to heat up your kitchen.

This recipe calls for four cups of berries. I had about 3 cups of fresh blueberries and added some frozen mixed berries to make the four cups. I used Splenda in this recipe. 

10 inch round speckled blue roasting pan.

The four cups of berries before and after adding the sugar, lemon juice, cinnamon, and flour.

Before and after adding the oil to the topping mixture. 

Ready for baking.

Baking on the barbecue.

INGREDIENTS:

4 cups blueberries, fresh or frozen
1/4 cup sugar or Splenda
zest and juice from one lemon
1 tsp cinnamon
3 tbsp flour

Topping:

3/4 cup flour
3/4 cup oatmeal
1/2 cup sugar, options: 1/4 cup brown +1/4 cup white or Splenda
1/2 tsp salt
1/2 cup butter or coconut oil
1/2 cup almonds or pecans plus a few extra for the topping

DIRECTIONS:

In a medium size bowl mix the blueberries, sugar, zest and lemon juice, cinnamon and flour. Combine well.

In a separate bowl mix together the flour, oatmeal, sugar and salt. Add the coconut oil or butter and mix together using a pastry blender or mixing spoon depending on the softness of the oil. The coconut oil I used was soft because it is summer time and I used a mixing spoon. I just blended the oil throughout the dry mixture. If the butter or coconut oil is hard, use a pastry blender and blend until the topping looks like crumbles. Add the 1/2 cup of nuts. I used pecan halves and did not chop them. Mix the topping with nuts. I added the nuts to the dry mixture before I added the soft coconut oil as the oil was very soft due to the warm kitchen.

Oil a medium size pan and add the blueberry mixture. Pat it down into the pan. Add the topping evenly over the blueberries and top with a few almonds or pecans if you wish. 

If using a barbecue, preheat the barbecue to 400 degrees F and place the pan over an unheated burner/element. Bake for about 60 minutes.

If using an oven, place into a preheated oven of 350 degrees F for about 45 minutes or until the fruit is bubbling and the topping is browned. Let the crisp cool before serving. Serves 6 or more depending on appetites. 

Adapted from natashaskitchen.com

Tuesday, May 2, 2017

APPLE PECAN LOAF

I have been reading a wonderful cookbook by Mark Bittman "How to Bake Everything". There are some many delicious recipes that it is hard to choose at times what to bake. In each of the recipes, Mark Bittman offers variations and where possible, how to make it vegan. I decided to make a recipe called 'fresh fruit and nut bread'. A number of interesting options are suggested for both the fruit and nuts. You can use fresh or dried fruit. I decided to use a fresh apple and pecans. It was also convenient that I had apple juice. I decreased the sugar and used 1/2 cup of Splenda. After mixing the wet ingredients to the dry ingredients (before I added the nuts and apple), I found the batter too dry to mix so I added about another 1/4 cup of apple juice. The batter is not supposed to be as liquid as cake since it is a bread style loaf but I thought it needed more liquid. I also added about 1 1/4 cups of chopped apple versus the 1 cup called for in the recipe. The apple I chopped was a generous size. Since I bake using a convection oven, the bread was done in 45 minutes.   

The apple and pecan loaf was scrumptious. It had chunks of apple, the pecans provided a nutty taste and the loaf was not too sweet.  The DH had to sample more than one slice. 

Chopped pecans and apple.

Top: Flour mixture with butter blended into it. Bottom: mixed batter.

Ready to bake in the oven.
Baked and ready for sampling.

INGREDIENTS:

2 cups of flour
1 cup sugar
1 1/2 tsp baking powder
1/2 tsp baking soda
1/2 tsp salt
1 tsp cinnamon 
4 tbsp cold butter
3/4 cup of apple juice or milk
1 tbsp grated orange or lemon zest
1 egg
1 medium size apple, chopped (makes about 1 cup)
1/2 cup toasted pecans, coarsely chopped 

Note: If you use apple juice, reduce sugar to 3/4 of a cup.  

DIRECTIONS:

In a large bowl, mix together the flour, sugar, baking powder and soda, salt and cinnamon. Cut the cold butter into bits, add to the flour mixture and cut into the dry ingredients using a fork, 2 knives or a pastry blender. See aside.

In a small bowl, lightly beat the egg, add the juice or milk and zest. Continue to beat to mix the wet ingredients. Pour the wet ingredients into the bowl with the dry ingredients. You don't need to overmix it. Add the apple and pecans and fold into the batter. The batter will be drier than a cake batter.

Add the batter to a greased 9 X 5 inch loaf pan and place in a pre-heated oven at 350 degrees F. Bake for 50 to 60 minutes or until the loaf is golden brown. Cool on a rack before serving. After 15 minutes, you can carefully turn the loaf upside down to release it from the pan and onto the rack.  

Adapted from "How to Bake Everything" by Mark Bittman