Friday, December 28, 2018

MUESLI

Muesli in a large container that can stored in the fridge.
There are a variety of muesli recipes one can find. Some are based on oatmeal and others are non-grain and consist of nuts, seeds, coconut and dried fruit. The main difference between granola and muesli is that granola is baked. Granola also has wet ingredients added to it like honey, maple syrup, nut butter or egg whites. The wet ingredients add a coating, helps the crunch factor and in some cases makes it clump. I like the simplicity of muesli as it doesn't require baking. 

Muesli can be added to yogurt, milk and as a topping to a smoothie, hot oatmeal, applesauce or stewed rhubarb. There are many ways to eat muesli. It is also convenient to take to work for breakfast or have as a snack. I store muesli in a large jar (about one and half litres or six cups) in the fridge. When ready to eat, I shake the jar a few times in order to get a good mix as some of the spices or smaller seeds might have dropped towards the bottom of the container. I use about half a cup as a serving if adding to almond or coconut milk for breakfast. I let it sit for about 2 minutes before I start to eat it. Besides the ingredients provided here, you can add other things such as cardamom, ginger, apple pie spice, dried berries and other nuts or seeds. I like adding both carob nibs and chocolate chips to the mixture. 

After mixing in a large bowl.

INGREDIENTS:
2 1/2 cups of rolled old fashioned oats (not instant)
1/2 cup raw almonds (chopped if you want)
1/2 cup raw pecans (chopped if you want) 
1/4 cup flax seed
1/4 cup chia seeds
1/4 cup raw pumpkin seeds
1/4 cup raw sunflower seeds
1/4 cup carob nibs
1/4 cup chocolate chips 
1/4 cup shredded or flaked coconut
1/3 cup raisins
1/2 tsp cinnamon 
1/4 tsp nutmeg


DIRECTIONS:
Add all of the ingredients into a large mixing bowl. Mix well with a wooden spoon or spatula. Transfer to a large jar for storage. I use a measuring cup to transfer the muesli to the large jar so that I don't make a mess. If using within two weeks it can stay in a kitchen cupboard; otherwise store in the fridge. I keep the jar in the fridge.  

Recipe adapted from heathermcclees.com

Sunday, December 16, 2018

LEMON POPPYSEED SOURDOUGH BRIOCHE BREAD


Several weeks ago I made a sourdough brioche bread. I got the recipe from a friend who also likes to make bread. Last week I had a craving for lemon poppyseed and thought about making a dessert style loaf. I thought about other options of which one was using the sourdough brioche bread recipe and adding lemon juice and zest and poppyseed to the basic recipe. This brioche bread recipe is what I would call a french style egg bread and you could create other kinds of bread based on the basic recipe. For example you could add chocolate chips/chocolate shavings, raisins, dried cranberries, shredded cheddar, chopped walnuts/pecans or herbs to the basic dough batter. What you need to think about is the quantity to add.

To make the sourdough brioche bread (basic recipe) into a lemon poppyseed bread, I added the following to the batter before the kneading started:

2 tbsp poppyseed
3 tbsp lemon juice
zest from one lemon

When I made the basic sourdough brioche bread I used three small baking loaf tins. This time round I used two large ones. I also let it rise for the second rise in the bread pans for over 2.5 hours. The bread turned out great and we both really liked the flavour.

The dough did a nice rise after one hour. 

Egg wash applied and now ready for the second rising.


Second egg wash applied and now going into the oven.

The results at the end.


I couldn't help myself. Butter from grass fed cows.


Saturday, December 1, 2018

CASSAVA CHEESY MINI BREAD ROLLS

Amongst the nutrition and recipe books collected on the years, we have the Plant Paradox and the Plant Paradox Cookbook. The DH has been interested in several recipes from both books and asked that I make this one. The recipe is modelled on a Brazilian cheesy bread Pao de Queijo. I have never tried this Brazilian bread but it looked delicious in the cookbook. The recipe has six ingredients and is based on cassava flour. I weighed the amount of cassava flour versus using a measuring cup. To create the cheese flavour you can use either Parmigiano cheese or nutritional yeast. You can make the recipe vegan if you use flax eggs. I used one and a quarter cups of Parmaigiano cheese. One cup would have been sufficient. 


The directions to make the dough requires a bit of mixing and calls for a stand mixer or a food processor that has a paddle. If I had to mix this recipe by hand, it would require 10 to 15 minutes of vigorous beating by hand. Personally I find using a stand mixer much easer. Be prepared for an irresistible cheesy bread aroma wafting from the oven while the bread rolls bake. I used a one and three-quarter inch cookie dough scooper to scoop the dough out of the bowl and bake them into small balls. If you use a tablespoon or a small ice cream scooper, you may need to dip the utensil into a bowl of water between scoops to keep the dough from sticking. The dough didn't stick using a cookie dough scooper. Cassava flour when baked is not the same as wheat flour. It is more moist inside and not as dry as wheat bread roll. The bread rolls taste good and the DH likes them. Next time I make them I would add a bit of dried dill or basil to the dough batter.

Dough cooling in the saucepan.
Eggs being added to the dough.

All ingredients have been added and mixed and now ready to be scooped onto the baking sheets.

Scooped onto the parchment paper.
Cooling off on a rack.
Close up.
INGREDIENTS:
1 cup of milk or almond or coconut milk
1/2 cup avocado oil
1 tsp salt
10 ounces (about 2 cups) cassava flour
2 large eggs or vegan eggs
1 to 1.5 cups grated Parmigiano-Reggiano or 1 cup nutritional yeast

DIRECTIONS:

1. Preheat the oven to 450 degrees F. You will need to use two baking sheets so you may have to adjust your racks to fit both in the oven at the same time.

2. Line the two baking sheets with parchment paper or silicone baking mats.

3. Into a medium size saucepan, add the milk, oil and salt. Heat over medium heat, stirring occasionally with a mixing spoon. Remove from the burner when big bubbles start to appear as the mixture is starting to boil.

4. Add the cassava flour to the saucepan and stir with a mixing spoon until it is well combined and it looks like dough. Let it sit for a few minutes so that it starts to cool off.

5. Transfer the dough into a bowl of a standup mix (eg mixmaster) fitted with a paddle attachment. Beat the dough for a few minutes on medium speed until it appears smooth and it cool enough to handle. 

6. Keeping the mixer on medium speed, add the eggs into the cooled mixture one at a time. Wait until the first egg is incorporated into the batter before adding the second. You will need to stop the mixer from time to time to scrape down the dough on the sides of the mixing bowl. Mix for a minute to two minutes.

7. If using cheese, beat it in on medium speed and make sure it is incorporated through the dough. You may have to scrape down the sides of the bowl if the dough is sticking to the sides. The dough will be soft and stretchy and a bit sticky.

8. Using a cookie scooper or another favourite scooper, scoop the dough out of the bowl and place onto the parchment paper. The dough will rise a little bit while baking so space out the scoops between the two baking sheets.  

9. Place the baking sheets in the oven and reduce the heat to 350 degrees F. Bake for 15 minutes, then rotate the baking sheets. Bake for an additional 10 to 15 minutes until the buns are golden. Remove from the oven and cool for a few minutes before serving or sampling. Makes 24 to 28 buns. 

Adapted from the Plant Paradox Cookbook by Steven Gundry.

Friday, November 9, 2018

SOURDOUGH BRIOCHE BREAD

A friend recently shared a recipe that I had to make. It uses sourdough starter and is a brioche style of bread. My friend uses a baguette baker to make several small loaves from this dough. The recipe makes one loaf, about a one kg size loaf. In the ingredient list, I provided two kinds of measurements for the ingredients. I used a scale for measuring everything except the dry yeast and salt and used a teaspoon to measure those two ingredients.

The dough mixture doesn't use a lot of sourdough starter, about 1/3 cup. I fed a bit of starter the day before and left it overnight on the kitchen counter to activate and get bubbly. I highly recommend using a mixmaster to knead the bread. I think it is far easier to knead the texture of this bread with some powered help. I decided to use small baking loaf pans to bake the bread. You could use a baguette baker, Emil Henry or other kinds of bakeware. As I read the baking directions rather quickly the first time, I didn't realize you needed to save the beaten egg that is used as a glaze as you glaze twice, before and after the second rise. After I glazed it for the second rise, I cooked the remaining beaten egg in the microwave and the dog enjoyed some cooked egg. I then had to crack another egg and slightly beat it to glaze the breads before baking.

The breads rose nicely in the three small loaf pans. Because of an errand that I had to do while the dough was rising for the second time, it was left to rise for over three hours. It worked out fine with the extra rising time. As difficult as it might be, it is recommended that you let the bread cool on a rack before slicing into it. While cooling, the smell of the bread was intoxicating. The bread has a wonderful texture and lightness and tastes as good as it smells. 

Starting to mix the dough batter.
After kneading using a mixmaster.


Starting the second rise.


Just out off the oven.

Cooling on a rack.


Starting to sample the bread


Prep and Cooking Time:

Mixing and kneading: 15 minutes
First rising: 60 minutes
Second rising: 90 minutes to 2 hours
Baking: 30 minutes

INGREDIENTS:
500 gm (4 cups) flour, plus extra for dusting the work surface
135 gm (1/2 cup) room temperature water
3 eggs
75 gm (1/3 cup) sourdough starter
2 tsp dry yeast
10 gm (2 tsp salt)
25 gm (1/4 cup) dry milk powder
35 gm (almost 1/4 cup) sugar
75 gm (1/3 cup) softened butter, plus extra for greasing the pans

Glaze:
1 egg, slight beaten

DIRECTIONS:
It is best to knead this bread using a stand mixmaster with a bread hook attachment. You can do it by hand but it is far easier to use a bread hook.

Put the flour, water, eggs, sourdough starter, dry yeast, salt, milk powder and sugar into the mixmaster bowl with the dough hook attachment. Knead for five minutes at low speed, then 6 minutes at high speed. Add the butter and knead for another four minutes. 

Remove the dough from the bowl and shape into a ball on a cutting board dusted with flour. Cover it with a slightly dampened kitchen towel. Leave it to rise for an hour. 

Dust a work surface such as a large cutting board or your counter with flour. Butter two or three small loaf pans. I used 8.5 X 4.5 inch pans. Divide the dough into two or three equal pieces depending on the number of pans you are using. Fold each piece over itself and roll between your hands to shape it into a small loaf. Place each one into a loaf pan. 

Brush the dough with the slightly beaten egg. Cover the pan with plastic wrap and cover the group of them with a large kitchen towel. If you have cold counters such as granite, I place the pans on a cutting board to sit on the counter. Let the dough rise for at least 90 minutes. I would let it rise for over two hours especially if making smaller loaves. 

Place a small or medium sized baking sheet with at least one inch sides on the bottom shelf of the oven and preheat the oven to 350 degrees F. Brush the brioche with the slightly beaten egg. Just before putting the bread pans into the oven, pour at least 1/4 cup of water onto the preheated baking sheet. The water will help steam the bread while baking.

Bake for about 30 minutes. Remove the pans from the oven and let the bread sit for a few minutes before turning them out onto a wire rack to cool. 

Adapted from 'The Larousse Book of Bread" by  Eric Kayser

Sunday, November 4, 2018

DIGESTIVE SOURDOUGH COOKIES

I have been thinking of different uses for sourdough starter and found these digestive cookies made with starter. I have always liked digestive cookies, especially dunked in tea. I followed the ingredient measurements used in this recipe from a UK website. I was going to convert the ingredients from metric to imperial but along the way I decided to weigh the ingredients using my kitchen scale. It was educational to see the what half a cup of oatmeal flour weighs versus unbleached flour and correlate it to metric weights. 

This recipe calls for the dough to be rolled out to the thickness of about one inch. I rolled them out to about half an inch and made just over double the number of cookies. I like smaller cookies. These cookies are wonderful and got a thumbs up from the DH. Next time I make them I may add cinnamon or cardamon.

Dough mixed up and ready to go into the fridge for an hour.

Two cookie trays of dough cookie going to be chilled for 15 to 20 minutes.

Let the sampling begin.

INGREDIENTS:

80gm oatmeal flour
100gm unbleached or wholegrain flour
50gm brown or palm sugar
pinch of salt
110gm unsalted butter at room temperature
100gm recently fed sourdough starter 

DIRECTIONS:

Using a food processor with the blending attachment, add the oatmeal and white flours, sugar and salt. Combine for 10 to 20 seconds. Add the butter to the mixture and mix until it comes together in a rough dough. If you don’t have a processor, combine the dry ingredients in a medium size bowl and then add the butter using a mixing spoon or spatula to combine the dough. Since I used salted butter, I didn't add a pinch of salt to the dough. 

Remove dough mixture from the food processor and place into a bowl. Add the starter and stir until well combined. Cover the bowl with plastic wrap and refrigerate until firm, about an hour.

Roll the dough out evenly on a lightly floured surface until it is approximately an inch thick. I like to roll them out between two large pieces of parchment paper. Cut circles of dough with a cutter, such as the rim of small cup and place on parchment/silicone paper lined trays. I used the rim of a small glass cup used to measure liquor. The cookies won't spread but it is good to leave a little room between them.  

Prick the cookies several times with a fork and put them back in the fridge for 15 – 20 minutes. 

Bake them at 350 degrees F for 15 to 20 minutes turning the tray once during baking. Check them at the 10 minute mark as you are looking for them to seem dry and firm and browned slightly at the edges and underneath. They will be slightly soft when they first come out of the oven and firm up when cooled. 

Transfer to cookie racks to cool down and store them in an airtight jar or container. Makes 22 cookies.

Adapted from http://brixhambread.blogspot.com/2015/05/sourdough-digestives.html

Friday, October 19, 2018

HEALTHY STYLE VEGAN PALEO CINNAMON BUNS

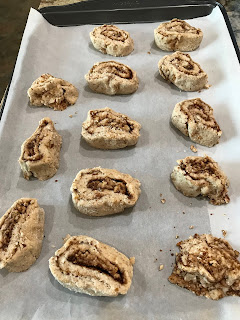
We sometimes have choices on a Friday afternoon and instead of curling up with a book or taking a nap, I decided to make these healthier cinnamon buns. They are classified as vegan and paleo and are a bit different than the gigantic, buttery, sticky and gooey cinnamon buns seen in many coffee spots. What makes them different besides being smaller in size is that they are made with almond and tapioca flours, small amount of coconut sugar, two tablespoons of coconut oil, two flax eggs instead of chicken eggs and some chopped pecans.  

I found this recipe on the blog site for 24 Carrot Kitchen . This site has wonderful recipes. This link provides good instructions for making these cinnamon buns. My photos show the progression in making the buns. The DH and I both liked the taste of these buns and would definitely make them again. 

I have a few comments on the ingredients and directions:

1. To make one flax egg, you mix one tablespoon of ground flax seed with three tablespoons of water in a small cup. Let it sit for 10 minutes to thicken. The ingredients call for two flax eggs, so just double the amounts. 
2. I used bullet proof coconut oil and didn't melt coconut oil. I used one tablespoon in the batter and one tablespoon basted on top of the rolled out dough.
3. The directions call for adding vanilla extract to both the batter and to the coconut sugar mixture on the rolled out dough. I just added vanilla extract to the batter as it didn't make sense to mix vanilla extract with the coconut sugar, salt and cinnamon that is sprinkled onto the rolled out dough.
4. Once the rolled out dough has everything added to it, eg, the coconut oil, coconut sugar mixture, maple syrup and pecans, you need to roll it up to make it into a tube. You use the parchment paper that the rolled out dough is lying on to help you roll it. It is very similar to when you make sushi and you use the sushi mat to help you roll up all of the ingredients lying on the big sheet of nori seaweed.  
5. I made 13 cuts into the rolled up dough. The recipe called for eight cuts. I like to make cookies and other treats smaller in size. I also did not want large cinnamon buns. As with making sushi, the ends never look pretty. 
6. I made a smaller amount of glaze and used icing sugar. I used four tablespoons of icing sugar and about two teaspoons of almond milk. Even that was more than what was needed. 

Dough rolled out.

Coconut mixture sprinkled onto the dough.

Maple syrup and pecans added. 

Rolled up similar to making sushi.
Sliced into 13 pieces.

Ready to bake.

Icing glaze added and ready to sample.


Sunday, October 14, 2018

PALEO RAISIN COCONUT COOKIES

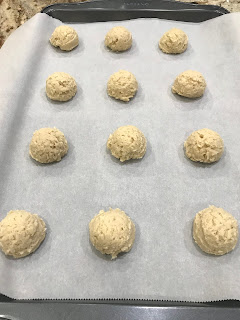
These cookies are very similar to oatmeal cookies without the oatmeal. I like this recipe as they have raisins and coconut. In some ways they are similar to Dad's cookies. I adapted this recipe from 'Against all Grain' by Danielle Walker. The cookies do not have many ingredients and are based on almond flour and coconut flour. What I also like about these cookies is that they are low in sugar. Of course raisins add to the sweetness. 

I used a small dough cookie scooper and made 24 small cookies. You can use a larger spoon or scooper to make a larger cookie. I used Crisco for vegetable shortening but you could use butter or coconut oil. To get an egg to room temperature, I let it sit on the counter for 15 minutes. You could go longer than that. Since I used creamed honey, I heated the required amount in the microwave for 20 seconds to soften it up. I forgot to add the flaxseed in my haste of mixing the dry ingredients. I didn't notice any difference. I used an apple spice mixture instead of regular nutmeg and liked the taste.  

A friend was visiting after the cookies came out of the oven and the cookies got the thumbs up from everyone.

I used a mixmaster to make these cookies. 

Small scooper used to make 24 cookies.

After the cookies are flattened using parchment paper + the back of a spoon.

Cooling on a rack.

INGREDIENTS:

1/4 cup shortening, soften
1 large egg, room temperature
1/3 cup honey
1 tsp vanilla

1 cup almond flour
2 tbsp coconut flour
4 tsp cinnamon 
3/4 tsp nutmeg OR apple pie spice
1/2 tsp baking soda
1/4 tsp sea salt
2 tsp ground flaxseed

3/4 cup finely shredded unsweetened coconut
1/2 cup raisins

DIRECTIONS:

Preheat the oven to 350 degrees F.

Either using a mixmaster or an electric hand mixer, placed the shortening and egg in a bowl and cream them together for one minute. Add the honey and vanilla and mix for another minute or so until creamy. 

In a separate medium size bowl, mix together the flours, cinnamon, nutmeg, baking soda, salt and flaxseed. Stir to combine. Add the dry ingredients to the wet mixture and mix for a minute or until combined. Scrape down the sides of the bowl and mix for another 30 seconds to one minute. Add the coconut and raisins and combine for another minute.

Line a large baking/cookie sheet with parchment paper. Using a dough scooper or spoon, drop balls of dough the size of a small golf ball onto the parchment paper with a little bit of spacing between each spoonful. Using a small piece of parchment paper, place the paper over the cookie and gently press down using the back of a spoon. They should be about 1/4 inch thick. 

Bake for 12 to 15 minutes until the edges are brown. Let them cool on the cookie sheet for 5 minutes before transferring them to baking rack to cool. Makes 12 to 24 cookies.

Friday, September 21, 2018

SOURDOUGH WAFFLES

With keeping a sourdough starter, you need to look at using the starter for other things besides bread. As you feed your starter each week, you increase the volume of starter and you either have to dispose of some of it, give it away or use it in baking and cooking. There are a number of recipes that incorporate a starter. I have researched a number of recipes and started to experiment. One successful recipe that I just made is Belgium waffles that uses a cup of sourdough starter. You can make pancakes instead of waffles with the batter. The batter in this recipe needs to rest for at least four hours before you make the waffles, therefore you have to build in prep time to allow for this to occur.

This recipe made seven large Belgium waffles They were crispy and not too soft on the inside. A favourite for eating waffles is to spread some nut butter over a waffle, followed by jam, applesauce or maple syrup. 

After resting the batter for about 6 hours.
The rest of the ingredients have been added.
Pouring the batter into the waffle maker.
Ready to eat


INGREDIENTS:

2 cups flour
1 1/2 cups water
1 cup sour dough starter
1/3 cup oil such as olive or avocado oil
2 eggs
2 tbsp sugar or maple syrup
1 tsp salt
1 tbsp water
1 tsp baking soda


DIRECTIONS:

In a large bowl, combine the flour, 1 1/2 cups water, and the sourdough starter. Cover the batter with plastic wrap and let sit in a draft free place such as the kitchen counter for 4 hours to overnight. There should be large holes and bubbles in the batter. If the room is slightly chilly, place a tea towel around the bowl.

To the batter, add the oil, eggs, sugar, and salt and mix well to combine. Whisk the one tablespoon of water and one teaspoon of baking soda together in a small bowl until dissolved. Fold into the batter with a rubber spatula.

Preheat your waffle iron according to the way you operate it. Pour the batter onto preheated iron and bake until crisp and golden, according to how your machine works. I used a Cuisinart double waffle maker and have it set to 4 on the cooking dial. Makes 7 large Belgian waffles. 

Modified from allrecipes.com

Sunday, September 2, 2018

SIMPLE GRANOLA

The easiest way to describe the differences between granola and muesli is that granola is baked. I hadn't thought about that until I started to research different recipes. I make both of them and my muesli tends to include nuts and coconut. You can add chopped raw nuts to the granola recipe and decrease the amount of seeds or even just add the nuts. Anything goes when making granola. If you don't want to add quinoa you can just increase the rolled oats by one cup.

When I made this recipe, I absently added the raisins into the mixture before baking it. Once I realized what I did and knowing that baking the raisins for that long would dry them out and make them tough to chew, I picked out by hand the cup of raisins I added. It was a bit like searching for gold. I did add the beaten egg whites to the granola. I am not sure how much of a difference it made in being more crunchy. I baked the granola closer to 50 minutes and I was diligent about stirring the mixture while it was baking. I like the addition of chocolate chips as it gives it a bit more sweetness and I never refuse chocolate. It is a great recipe to make and one that will be a staple in my kitchen.

Granola cooled and with added raisins and chocolate chips.
Breakfast: Cottage cheese, prune plume, raspberries and granola.

INGREDIENTS:

5 cups rolled oats (not instant)
1 cup quinoa
1 cup mix of hulled raw seeds such as sunflower, pumpkin, sesame, flax
1 tsp cinnamon 
1/2 tsp salt
1/2 cup honey or maple syrup
2 tbsp olive oil

Option: 2 egg whites beaten until frothy

1 cup raisins or other chopped dried fruit 
1/2 cup chocolate chips

DIRECTIONS:

1. Heat the oven to 350 degrees F. 
2. In a large mixing bowl, combine all of the dry ingredients except for the raisins. Mix well.
3. Drizzle the honey or maple syrup and oil over the mixture and mix well. You can add more sweetener if desired.
4. If you want a crunchier granola, add the beaten egg whites to the granola mixture and stir them into the mixture. 
5. Add the mixture to a large rimmed baking sheet. I lined my sheet with parchment paper. 
6. Bake for 35 to 45 minutes and stir every 15 minutes so that the granola is toasted evenly. Watch so that it doesn't start to burn. 
7. Remove the pan from the oven and add the raisins. Stir.
8. Once it cools, add the chocolate chips and mix. I added a generous 1/2 cup of chips.
9. Store in a large container in the fridge. Keeps for several months. Makes about 8 cups. 

Modified from 'How to Bake Everything' by Mark Bittman

Saturday, August 25, 2018

STARTER AND SOURDOUGH BREAD

I have been buying wonderful sourdough bread from a local small company on a regular basis. I find that eating sourdough bread is easier on the GI system than regular bread. I have always liked making bread and it has been years since I have made my own starter. I would make a 24 hour sponge but that is not the same as using a sourdough starter. I had the opportunity to get some well established starter and I knew that this starter made great sourdough bread as I had sampled the bread. I traded garden basil and parsley for a generous cup of sourdough starter. 

In looking at several bread making cookbooks and the internet, I came across a website from cultured food life that I quite like. It has good explanations on starting, using and maintaining your starter and a recipe for an overnight sourdough bread. I got the starter yesterday and thought why wait, let's make bread. Last night I started the process for overnight sourdough bread. I baked it early this morning. I have provided the link here to the website as the explanations are wonderful. I followed the directions and also the recommendation to weigh your ingredients. I used unbleached flour. I plan to use some of the sourdough starter for pizza dough and other baking goodies. Some people give names to their starter as they feed and maintain their starter for years. I haven't thought of a name just yet. 

Here are some photos showing the process. The bread turned out airy, not dense and it has a good chew. I have tested it already as I had the heel for breakfast with almond butter and jam and a toasted slice at lunchtime with some melted Swiss cheese, garden tomato and garden cucumber. The DH has also done some taste testing.


Starter in a glass jar, mixing some of the starter with warm water and mixing the flour into the dough.

Dough has been mixed and rose overnight. It rests for 30-60 minutes in a flour coated dish towel before it is baked.

Dough is nestled in parchment paper that is placed in an Emile Henry pot and baked.  Ready for sampling after it cools for 25 to 30 minutes.


Thursday, July 26, 2018

BLUEBERRY LEMON PALEO MUFFINS

In thinking about making muffins today, I thought about the various flours I use in cooking and baking. I have a variety of flours on hand and most of them I keep in the fridge. I did wonder about coconut flour as I have been keeping coconut flour in the fridge and was curious if it was necessary. From reading various posts on the internet I will keep it in the fridge. I buy a big bag of almond flour from Costco and have kept that in a cupboard where I keep dry goods. I use it fairly frequently and it is kept in quite a sturdy bag. For now I have decided to keep it in the cupboard which is a dark and located in a cool spot. 

With all of the fresh blueberries available it is an opportune time to make blueberry muffins. This recipe from paleorunningmomma included ingredients I had on hand so I decided to make it.  I made a few modifications to the original recipe. I used coconut milk in the cartoon as it is more handy and I don't cook enough with canned coconut milk to warrant having leftovers in the fridge. If you use canned coconut milk, shake the can really well before opening it. I also used liquid coconut oil instead of melting coconut oil. I do have coconut oil in the plastic container but decided to use some of the MCT oil I have on hand. The directions call for using a hand mixer or other mixing gadgets. You can make these muffins without a hand mixer and using a whisk will work just as well. For a muffin tin I like to use one made with silicon as it doesn't require muffin tin paper liners. 

Messy silicon muffin tin that I used to make the muffins.
Muffins cooling in the pan.

Ready for sampling.


INGREDIENTS:

4 large eggs
1/2 cup full fat canned coconut milk or coconut milk in the cartoon
6 tbsp honey, maple syrup or stevia
3 tbsp coconut oil, melted and cooled
1/4 cup lemon juice
zest from a small lemon (optional)
1 tsp vanilla extract

2/3 cup coconut flour
1/4 cup tapioca flour
1 tsp baking soda
1/8 tsp salt

3/4 -1 cup of fresh blueberries (can use frozen blueberries that are thawed)

DIRECTIONS:

Preheat the oven to 350 degrees F. If using a metal or non-stick muffin tin, line the cups with muffin tin paper liners. 

In a large bowl that can accommodate a hand mixer or using a mixmaster (I used a mixmaster in mixing these muffins), add the eggs and blend them until they are mixed. Add the coconut milk, honey or other sweetener, coconut oil, lemon juice, zest and vanilla extract to the bowl with the beaten eggs and mix well. 

In a separate medium size bowl, add all of the dry ingredients and mix well. Slowly add the dry ingredients to the wet ingredients using low speed until combined. The batter will be thick because of the coconut and tapioca flours. Add the blueberries and fold into the batter using a mixing spoon. 

Using a large spoon, add the batter to each of the lined muffin cups filling it to about 3/4 full. Bake for 20 to 25 minutes. I had the oven on convection and took the muffins out after 20 minutes. Let the muffins cool in the muffin tin for about five minutes and then remove each muffin and transfer them to a cooling rack. Store in the fridge for three to four days and freeze any leftovers. Makes 12 muffins.

Adapted from paleorunningmomma.com